This Is How Long It Takes For Beer To Carbonate In A Bottle & Keg
Recently while researching home brewing, I read a lot of forum posts.
A question that people ask a lot is how long it takes for beer to carbonate in the bottle. I did some reading and found out the answer to this question.
How Long Does it Take for Beer to Carbonate in a Bottle? After you have bottled your beer it generally takes 2-3 weeks for the carbonation process to be completed. This can vary depending on which type of beer you are making but is a good rule of thumb. Make sure you research bottle carbonation times depending on which beer you are brewing.
Continue reading as I dive into how to find out how long to carbonate your beer, and what exactly happens in the bottle as it carbonates.
Read Also: What Are The Best Bottles For Homebrewing?
Now, How Long Does it Take for Beer to Carbonate in a Bottle?
From reading multiple articles and forum posts about the minimum time it takes for a beer to be done conditioning in a bottle, the answer is always a minimum of 2 weeks.
This seems to be the overall minimum it takes for the CO2 to integrate itself into your beer and give it that foamy creamy taste and texture you love.
If you aren’t impatient, leaving your beer in the bottle for long periods of time can benefit the taste and quality of your beer.
Like with many wines, aging beer can improve the taste gradually.
Make sure you understand the type of beer you are making and read up on experts’ advice as to how long to leave it in the bottle before opening.
If you are experimenting you can do sample tests and open up a bottle during the process to find out how long it takes to age your beer to fit your personal taste.
The Bottle Conditioning Process
When understanding how long you should leave your bottle to condition, it is also worth knowing why you should leave it.
As you may know, the fermentation process includes yeast that consumes sugar and turns it into alcohol and carbon dioxide.
When you bottle your beer, the yeast is still consuming the last of the sugar which creates CO2 for your carbonation process.
The CO2 will first try to escape by flowing up the bottle in the little airspace available. Afterward, it will get a bit crowded and be forced back into the beer, kicking off the carbonating process.
This as we all probably know, is what creates those nice fizzy bubbles that give a great tingling sensation when you drink a beer or any other fizzy beverage.
Learn more about giving your beer an extra fizzle by clicking on this post.
Tips For Proper Bottle Conditioning
When carbonating/conditioning your beer, there are some general things you have to consider.
Here are some tips to help you when bottle conditioning your beer:
- Sanitize! This should be a no-brainer for any homebrewer. Always make sure to sanitize everything especially when transferring your beer to bottles. Any unwanted germs and bacteria can contaminate your beer and create unwanted flavors or textures, resulting in a ruined batch.
- Make sure fermentation is complete. A common mistake homebrewers make is starting bottle conditioning before the primary fermentation has completed. If you are in doubt, wait a while longer. A good tip is to use a hydrometer to track your fermentation process.
- The right temperature. You may know the importance of temperature when fermenting, and the same applies to bottle conditioning. In general, you keep it at the same temperature as the fermentation, and remember to keep it away from sunlight!
- Perform taste sample tests. If you are unsure how long you want your beer to condition, take a sample test during the process to find a conditioning time that fits.
- Use the correct quantities of sugar. If you are unsure about the sugar level for your priming of the yeast, you can use this calculator to give a more decisive answer and avoid and guestimations.
We made an entire post about the impact of sugar on alcohol content. If you want to know more about it, get all the details here.
So in conclusion, the overall minimum time for a beer to condition in a bottle is 2 weeks. This is quite simply the minimum time it takes for your beer to be fully done carbonating and give the desired results
Make sure you know your recipe, as different types of beers may have varying carbonating times, or will simply taste better if you leave them in the bottle longer.
How to Force Carbonate Beer Using a Keg
Force carbonation is an alternative way to speed up the carbonation process of your beer. Contrary to the 2-3 weeks it usually takes a beer to carbonate in a bottle, you can speed this process up by using kegs.
TIP: Instead of using the natural way of creating CO2 by using yeast and sugar, you can directly add CO2 to the beer using a gas cylinder.
There are two main methods when force carbonating, both similar but with different speeds.
Here is a list of things you’ll need for either method:
A keg
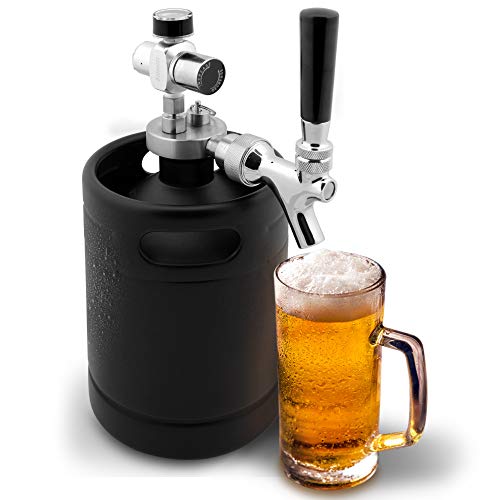
- 3 MONTH STORAGE: Traditional growler tanks/kegs will let carbonated drink go flat after first pour but not this mini tank growlers. It...
- DETACHABLE REGULATOR & SPOUT UNDER PRESSURE: The new spear cap lid style allows you to detach both the regulator & spout while keeping...
- NO SCRATCH POWDER COATED STAINLESS STEEL: NutriChef home brewing growler keg 6 oz set has food-grade 304 stainless steel keg barrel &...
Last update on 2026-06-07 / Affiliate links / Images from Amazon Product Advertising API
A Gas regulator

- Safety & No Leaks: FERRODAY CO2 keg pressure regulator features a heavy-duty forged brass body, well made connections, and exquisitely...
- Easy to Adjust by Hand: CO2 regulator has 2 control knobs, big adjustment knob enables more precise control even small adjustments,...
- Lock Ring to Hold PSI & Big Gauge Clear View: A lock ring under the big knob, so the knob can be firmly locked to hold your pressure...
Last update on 2026-06-07 / Affiliate links / Images from Amazon Product Advertising API
A gas cylinder containing CO2

- Aluminum Carbon Dioxide Cylinder with CGA 320 valve installed and carry handle/valve protector.
- 20 Pound (LB) capacity, Shipped empty.
- 1800 PSI, DOT-3AL and TC-3ALM designed, high strength aluminum alloy 6061-T6.
Last update on 2026-06-07 / Affiliate links / Images from Amazon Product Advertising API
A Kegerator (fridge for kegs)
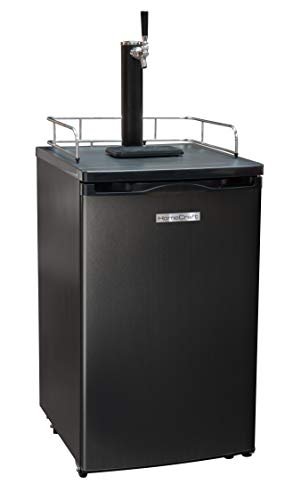
- Large capacity: spacious 4. 9 Cu. Ft. Capacity holds 1/6, 1/4 (short and slim) and 1/2 barrels of beer, accommodating for large...
- Stylish design: The Black Stainless Steel door gives it an elegant look and is featured with a hardtop pouring station, black tap...
- Recessed door handle: the recessed door handle provides a flushed finish with the door and the insulated rubber gasket inside keeps the...
Last update on 2026-06-07 / Affiliate links / Images from Amazon Product Advertising API
Proper keg post liquid

- Ball lock disconnects with beer keg
- Already attached a special 1/4" nut that has a 5/16" hose barb attached
- Quick disconnect home brew keg coupler
Last update on 2026-06-07 / Affiliate links / Images from Amazon Product Advertising API
Gas line fittings

Last update on 2026-06-07 / Affiliate links / Images from Amazon Product Advertising API
Preparation
Prepare your keg by first removing the gas socket from the gas line and keep it in a safe area. Afterward, remove the liquid socket from the liquid line and connect it to the gas line. Doing this is what allows you to direct gas through the liquid line.
Once you have done this turn on the gas cylinder, and make sure there are no leaks. The next step depends on which method you choose to use, method 1 requires the least work but method 2 is the fastest, requiring more effort.
Method 1
Make sure the gas line isn’t leaking, and use the kegs pressure valve to make sure gas is flowing through your keg correctly.
As you release gas into your keg you should hear bubbling which indicates that the CO2 is working correctly and integrating itself to your beer.
If you are sure everything is in order, adjust your regulator and raise the pressure to 20 PSI. Your beer should then be done carbonating within 7 to 10 days.
Method 2
The second method is the same on a ground level, with an extra step.
First, you attach the gas line to the keg in the same manner. You now have to turn the gas supply up to 30 PSI.
Then comes the extra step of shaking your keg vigorously. As you shake it you should instantly hear rapid bubbling inside the keg.
Shaking the keg will speed up the carbonation process since you are forcing the CO2 and beer to react faster by shaking them together.
Shake the keg for about 20-30 minutes(don’t pass out) then lower the pressure to 20 PSI as in the first method and leave your keg to carbonate.
Instead of the 7 to 10 days the first method takes, the second method only takes between 2 and 3 days for your beer to fully carbonate!
Carbonating beer in kegs can save you a lot of time, but it comes with quite the investment.
If you simply just want your beer to be done the fastest way possible, kegging is probably the way to go.
Keep in mind, that all the things you need for carbonating in kegs cost quite a lot more than just leaving your beer in the bottle for 2-3 weeks.
If you are prepared for this investment however, you will cut away a lot of the time between brewing and drinking your own beer.
Read Also: What Is The Easiest Type Of Beer To Brew?


