How To Make Brandy: The Ultimate Guide
Do you ever wish that you could make brandy from home instead of having to drive to the store every time you want a little sip? You’re in luck, as I’ve compiled the ultimate guide to making brandy from the comfort of your own home.
To make brandy, you’ll first need wine. But whether it’s store-bought or homemade is up to you. You’ll heat your wine in a still, usually via a dutch oven, then separate the foreshots, heads, and tails from the concoction and bottle up the hearts.
Does this all sound like gibberish to you? Below, I’ll go over everything you need to know about Brandy and then walk you through the process of making the drink yourself, step by step. I’ll also answer some of your most frequently asked brandy-related questions.
Brandy 101: What Is Brandy?
Brandy is a distilled spirit made from fermented fruit juice that can be produced from apples, pears, plums, or other fruits. The word “brandy” comes from the Dutch brandewijn (burned wine), referring to the distillation process.
Brandy is usually associated with France and its Cognac region. Still, many kinds of brandy are made worldwide today, including Armagnac in France and Grappa in Italy.
The production of brandy begins when the wine of your choice is distilled by separating alcohol from water through distillation. The resulting clear liquid has an alcohol content between 40% and 60% ABV (80-120 proof).
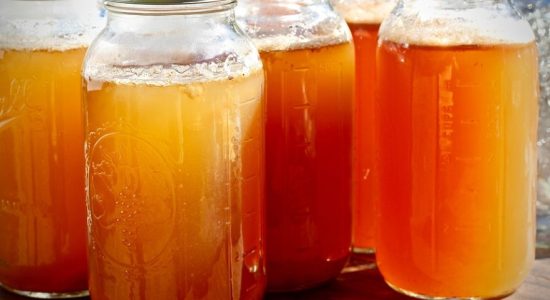
A Two-Part Process: Wine Making and Distilling
To make brandy, there are two main steps to follow. First, you make wine. Then, you distill it. Simple enough, right?
Well, it can be even simpler if you need it to be.
If you already have access to good-quality wine, you may wonder if you need to go through the entire brandy-making process as the forefathers of distilling once did. You can actually use store-bought wine and skip the wine-making process if you want to make brandy.
However, making homemade brandy means going through the process step by step, from start to finish. You can skip the wine-making step, but your brandy won’t be completely homebrewed in this case.
With that said, distilling an already-made bottle of wine is still an excellent option if you want to experiment with brandy-making without investing excessive amounts of time and effort into the process.
The Still in Distilling
Now, it’s possible to distill wine and make brandy without a still, but it will be much more difficult. To do this without a still, you must build your own device, which is often more expensive and time-consuming than just ordering one. However, make sure to do your research and read some reviews before committing to it.
Foreshots, Heads, Hearts, and Tails
When reading about brandy, you’ll find some vocab that’s not so common in wine and beer brewing. Foreshots, heads, hearts, and tails are distillates that come out of your wine after distillation, and they do so in that order.
The first two batches of distillate that come off the still before you collect your brandy are foreshots and heads, which should be tossed. Hearts are third, which is what you need for brandy. Lastly, tails are also typically tossed.
Why toss them? The heads contain chemicals and oils, which can be harsh-tasting if left in your brandy, as they’ll make it taste like nail polish remover and even make it more toxic. The tails are also not great for your final product because they’re very high in esters and low in alcohol content. So don’t leave them in!
Why Oak Barrels Are Usually a Part of the Process
Barrel-brewed brandy is a variation of the traditional spirit. It’s a process that involves blending several different casks and then aging the final product in an oak cask, which gives it its distinct flavor.
Brandy is originally made from wine, so it has a lot of fruity notes that make it a delicious cocktail ingredient or sipper by itself. The oak adds another layer of flavor to this already delicious spirit, but if it’s not done right, it can make your brandy taste like old shoes and a wet dog.
I usually skip any oak barrel aging for homebrewing and just go straight for bottling. However, oak brewing might be the process that can help you step up your brandy game.
How To Make Brandy
1. Gather Your Tools
One of the most important tools for this process is called a still. You may have used a still before in cooking, which works for the same purpose in homebrewing and distillation.
A still is a device that separates alcohol from water, and it can be made from a pot and condenser or copper tubing. It makes brandy, whiskey, rum, vodka, and gin and can be heated with an electric element or a gas burner.
You’ll also need some basic tools:
- A thermometer to measure the temperature of the liquid
- A hydrometer to measure how much alcohol is in what boils
- At least one 1 liter (1.05 qt) jar or bottle to store your finished product
A funnel will be helpful when it’s time to pour the brandy through your strainer and into its container.
2. Shop for Your Ingredients
The second step is gathering your ingredients. If you want to go the extra easy route, you will need the following:
- 1 gallon of wine (3.79 liters). You can use any kind of wine, but for this tutorial, we’ll be using a cheap bottle of white)
- 2-3 pounds (0.91 kg) of sugar (depending on how sweet you like your brandy)
- Nutritional yeast
If you’re going big, you’ll need all the ingredients for wine. These would be:
- About 10 lbs (4.54 kg) of crushed grapes or about 25 lbs/11.34 kg if making white wine)
- 7-9 lb (3.18-4.08 kg) of sugar per gallon of grape juice
- Yeast (available at most grocery stores)
Wine isn’t just grapes and sugar, though. Additives, different kinds of fruit, and different processes make it taste different. I’d highly suggest experimenting with wine-making if you want to perfect your brandy.
3. If You’re Going To Make Your Own Wine, Do This First
Making your own wine isn’t necessary, but it’s a fun part of the process if you want to go all homemade. I have many guides on my blog for making wine, but you can start with an easy no-yeast recipe. I also run through some of the best wine-making kits in this article.
Here are the steps to make your own wine:
- Set up your brewing area. Make sure to sanitize everything before beginning. Wine-making can be broken down into three phases, including crushing (destemming), fermenting, and pressing (racking).
- Crush the grapes. This process separates the pulp from the skins and seeds by gently pressing them with your hands or a wooden rod. If you’re using another kind of fruit, just be wary of its sugar content. You want more sugar, not less, so be ready to add some white sugar for low-sugar fruits like berries.
- Mix them together before pouring them into containers for fermenting. This involves adding yeast to convert sugar into ethanol and carbon dioxide.
- Add yeast to the fruit mixture and cover with cold water. Depending on the recipe you use, I’d say about 2 cups (473 ml) of water to every 1 quart (950 gr) of fruit that you’re crushing would be ideal.
The fermentation process occurs in an airtight container known as a barrel or vat, which is why you’ll put everything in your container, lock it, and put it in a cool dark place. You can also buy glass jars with airtight locks for this process.
This process can last anywhere between two weeks and several months, depending on temperature and other factors, such as how much sugar is present in the grape juice.
4. Start the Distilling Process
Now that you’ve made your wine, it’s time to distill it, which is how you separate the alcohol from the water in your wine and turn it into brandy. Everything that you haven’t already used, you’ll use for this part of the process, so be sure to gather everything else.
You’ll need the following:
- A stovetop still, which is what puts the STILL in distilling.
- Dutch oven that can fit your still
- A strainer or colander to filter out sediment
- A funnel or coffee filter to filter out sediment
- A thermometer to keep track of temperatures
- Glass for filtering
- Jars
- A jar for storing your brandy after distillation. You could reuse an old liquor bottle or buy a new one.
Distilling wine is a process that’s fairly easy to understand. Still, it can be complicated because you’re working with alcohol. To ensure that you have a clean brandy, you must filter out the foreshots, heads, and tails during the distillation process.
5. Create Your Double Boiler and Fill the Still
To start the process, put together your dutch-oven double boiler. Those familiar with chocolate making and baking have probably done this before. Essentially, you want your dutch oven to be filled with enough water to get the sides still warm without exposing the still to direct heat or flame.
You’re going to need to leave a little room for bubbles. Put the still in hot water, then fill it more than halfway, but not more than three-fourths of the way.
Follow your still instructions next. Typically, you’ll put cold water in the condenser. You’ll usually also put the spout of the condenser tube in a glass so that what’s coming out isn’t spilling everywhere.
6. Heat Your Wine
The heat is on! Remember that you aren’t boiling your wine, but rather, heating it up. You’re slow cooking it so that all the impurities have time to get out of it. If your wine is boiling, your still is much too hot. If alcohol is coming out quickly, turn down the heat.
You want to have full control of this process and let everything happen slowly.
7. Get Rid Of Your Foreshots and Heads
Your foreshots will come out of the distiller, and they will smell awful, like chemicals, and be very strong in their alcohol scent. These need to be tossed! They are toxic to drink and don’t taste good at all.
After your foreshots, the heads will come. These are sometimes saved by brandy brewers, but I just toss them in favor of the next batch.
8. Collect Your Hearts
After letting the foreshots and heads get tossed, your hearts are coming. When you stop smelling a strong chemical smell, you’ll know they’re ready. At this point, the liquid should smell like fruit, grapes, or whatever else you had in your wine. It should not smell like acetone!
Additionally, this batch should be pretty clear. Keep sniffing as you make it because once it stops smelling sweet, you’ve gotten to the tail end.
9. Get Rid Of Your Tails
The smell will turn once more into something foul and chemical-like. This is your tail end, and it needs to be tossed as well. Your tails will also exhibit a visual change from your hearts, as they’ll be cloudy, even milky in their viscosity and appearance.
10. Bottle Up and Enjoy!
Those hearts you just collected? That’s brandy!
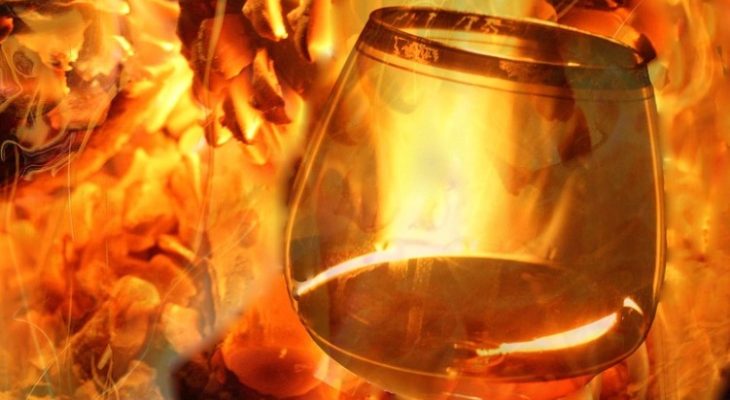
When you’re ready to bottle your brandy, it’s very important to remember that the liquid is flammable and can ignite when exposed to open flame, so you’ll want to keep all open flames away from the bottles.
Start by selecting the right bottles.
You want to use the ones that are made of glass and have a smooth surface, as this will help with labeling. If you don’t have any empty bottles lying around, you can always buy some new ones at a liquor store or online.
Clean the bottles thoroughly with hot water and soap, then rinse them well and allow them to dry completely before filling them with brandy. Don’t skip this step, even if your bottles are brand new, as any living bacteria can make your entire batch a mess.
Use a funnel to pour the brandy into each bottle, making sure not to overfill it. Check each bottle for leaks by holding it upside down for about 10 seconds before setting it upright again. If you notice any leaks, discard that bottle and start over again with another one.
Label each bottle with a name and date, so you know how long ago the spirit was bottled.
Final Thoughts
Making brandy can be extremely fun and rewarding, but it’s not for everyone. It takes time and dedication, but if you’re willing to do the work, you will be rewarded with delicious homemade brandy.