Thumper Keg Explained (Info & 5 Best To Buy)
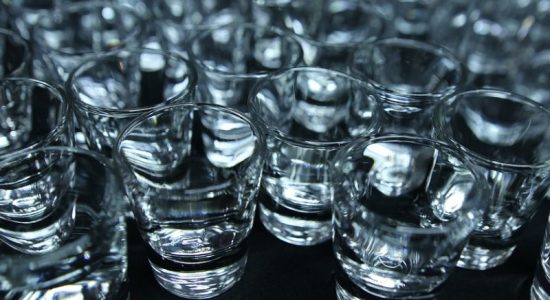
Moonshine making is a historically illicit business but it is a thriving one in modern times. Depending on where you live, you may enjoy more relaxed laws allowing you to produce “legal” moonshine.
Several states, including Arizona, Missouri, and Michigan, permit alcohol distilleries at home as long as the product isn’t sold in public.
Read Also: The Best Moonshine kits – Complete Buyers Guide
If you are one of those lucky few, it’s easy to try your hand at making moonshine or even craft beer. All you need are the right tools to get started. Nowadays, it’s pretty easy to find high-quality and complete stills for your stock of moonshine.
For the people after my own heart, or those interested in highly potent spirits and reliving the history of hillbilly, backwoods moonshine, then you need a good thumper keg for your still.
TL;DR: A Quick Keg Summary
In this guide, I’ll be going over everything you need to know about thumper kegs — starting with the five best ones available online.
Before diving straight into the nitty-gritty, though, let’s go over some thumper keg basics:
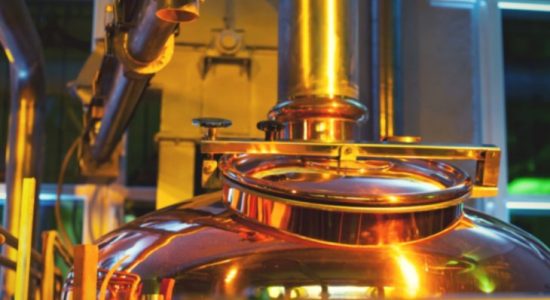
- What Is a Thumper Keg: A thumper keg is a wooden, steel, or copper container placed between your still pot and condenser.
- What Does a Thumper Keg Do: Its main purpose is to speed up the alcohol distillation process. A thumper keg distills your low wine again, transforming it into a spirit with higher alcohol content or proof.
- What Else Can You Do With a Thumper Keg: Aside from hastening your distillation process, a thumper keg is also used to infuse flavors into your moonshine.
- What Size Thumper Keg Should You Get: I recommend getting a thumper keg that is around 25% to 40% of the size of your main boiler if you are not big on infusing your moonshine with flavors.
Thumper Keg Explained (Info & 5 Best To Buy)
Using a thumper keg basically lets you produce high-proof moonshine and spirits while skipping the double-distillation method. All you need to do is connect your thumper keg to your main pot boiler and condenser, then you’re all set.
As long as you have a good grasp on these basics, you’re good to go buy and use your first thumper keg.
Top 5 Thumper Keg Recommendations
If you’re ready to make your moonshine distillation more efficient and take your moonshine flavors to the next level, here are my top five thumper keg recommendations.
1. YUEWO 3-Pot DIY Stainless Steel Moonshine Still with Thumper Keg (2 gallons)
This is my go-to thumper keg recommendation for both budget buyers and moonshine beginners.
Stainless steel is usually cheaper than both copper and wood thumper kegs. And at around $100, this product includes not only the thumper but everything you may need to start distilling your moonshine, including a 3-gallon or 12-liter pot still or boiler.
It uses lead-free and food-grade materials, including safe and non-toxic red copper tubing. It also has a built-in thermometer to make it easier to check and maintain the temperature.

- Professional Stills - complete distillation equipment,suitable for beginners or expert distiller,easy to handle and installation.3 Pots...
- Material and Construction - safe & non-toxic red copper and stainless steel material,There is NOT ANY lead in all the parts,Stainless /...
- Build-in Thermometer - Metal Thermometers show as: Celsius & Fahrenheit, So Operator can Inspect the Temperature easily when Running...
Last update on 2026-06-07 / Affiliate links / Images from Amazon Product Advertising API
2. Stampede Stills Copper Moonshine Still Thumper Keg (3.3 gallons)
For my seasoned moonshiner readers who just want a high-quality thumper keg to add to their setup, then this one’s for you. The 3.3-gallon Stampede Stills Copper Moonshine Still Thumper Keg may seem too expensive at first glance with its $355 price, but it ultimately offers the best bang for your buck.
This container is made from a pure 20-ounce copper sheet and holds up to 3.3 gallons of liquid. It is also already fitted with a temperature gauge, 3-inch locking clamp, a bottom valve drain, and copper pipe handoffs to attach pipes going to your pot still and condenser.

- Made from 20 ounce copper sheet and holds 3.3 Gallons of liquid.
- Includes Temperature gauge so you will know if your thumper is running too hot or too cold.
- 3" access with locking clamp, lid and gasket on top.
Last update on 2026-06-07 / Affiliate links / Images from Amazon Product Advertising API
3. AOKEL Moonshine Still Home Brewing Kit (9.6 gallons)
The AOKEL 9.6-gallon moonshine still home brewing kit is perfect for anyone planning to make a large amount of alcohol. Since this is a complete brewing kit, take note that the 9.6-gallon capacity refers to the main boiler, not the thumper keg.
All three pieces of this home brewing kit are fitted with an airlock top for added security and to aid the fermentation process if you choose to go down that route. The containers are made from safe, premium-quality stainless steel while the pipes connecting all the pots are made from safe, non-toxic red copper.

- (SAFE and NON-TOXIC MATERIAL)Boiler, thumper keg and condensor (worm) material is premium-quality stainless steel. Vapor and final...
- (Rapid Cooling)Red copper coils with rapid thermal conductivity assures promising cooling performance together with large contact area...
- (Upgrade with Thumper Keg)Thump keg helps draw off the hot vapor, which in turn helps vaporize the alcohol for a type of second...
Last update on 2026-06-07 / Affiliate links / Images from Amazon Product Advertising API
4. VEVOR Moonshine Still Home Brewing Kit (5 gallons)
For a medium-sized complete home brewing setup, I always recommend the VEVOR Moonshine Still Home Brewing Kit. This particular one has a 5-gallon main boiler and a 7×4-inch thumper keg.
The basics of this kit are quite similar to the AOKEL one. The main differences lie in the VEVOR’s energy-efficient and reusable water pump and food-grade silicone tubing. This product also has a one-way air exhaust valve for easier air control, especially during the fermentation stage.
No products found.
5. Jaybird Distilling Thumper for 64-oz. Canning Jars or Stampede Stills Copper Half-Gallon Mason Jar Thumper Kit
Thumper kegs aren’t particularly difficult to make. Anyone who’s a dab hand at building things can make one based on a few photos from Google. If you want a true, hillbilly, DIY homebrewer experience but don’t have the time to make a whole thumper keg, then I highly recommend these two products.
No products found.
Both the Jaybird Distilling Thumper and the Stampede Stills Mason Jar Thumper Kit are great for DIY distillers working with a small amount of alcohol. The Jaybird Distilling Thumper is made from stainless steel and fits into 64-ounce canning or mason jars.
Meanwhile, the Stampede Stills Thumper Kit is made from a 20-ounce copper sheet and fits into half-gallon and wide-mouth canning or mason jars. The inlet pipe also features an elbow bend to help avoid hot spots on the glass bottom of the jar.

- Made from 20 ounce copper sheet, silver based lead-free solder, gasket, and is 1/2" copper pipe. The inlet pipe has an elbow to prevent...
- 1/2" copper pipe stubbed out for easy plumbing to your existing still. Additional pipe/coupling/unions to connect to your setup are NOT...
- Works on 1/2 gallon canning Mason jars with standard wide mouth lids.
Last update on 2026-06-07 / Affiliate links / Images from Amazon Product Advertising API
Take note that both of these products only include the top or cover fixing, not the jar itself.
Now, if you want to know more about the history of the humble thumper keg and the details of how to use it, and more, then keep on reading.
Thumper Keg 101
A thumper keg also goes by a couple of other names, including doubler, thump barrel, and thump chest. It’s a smaller vessel or container that sits between the still pot or main boiler and the condenser.
The thumper keg lets you produce a high-proof spirit without having to run the whole wash through your entire distillation setup. It refines the low wine and distills the output spirit again in a shorter period.
Many people believe that the thumper keg gets its name from the moonshine mash falling into the keg. That’s far from it, though. The thumper keg gets its name from the near steady thumping sound you hear once the condensed low wine mixes with the vapors inside the container.
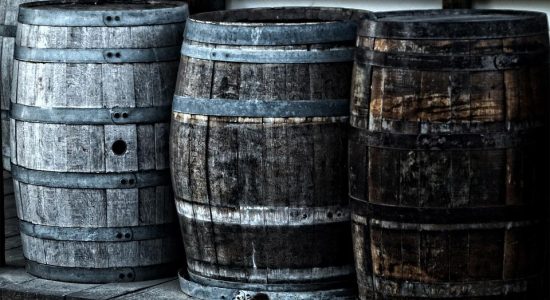
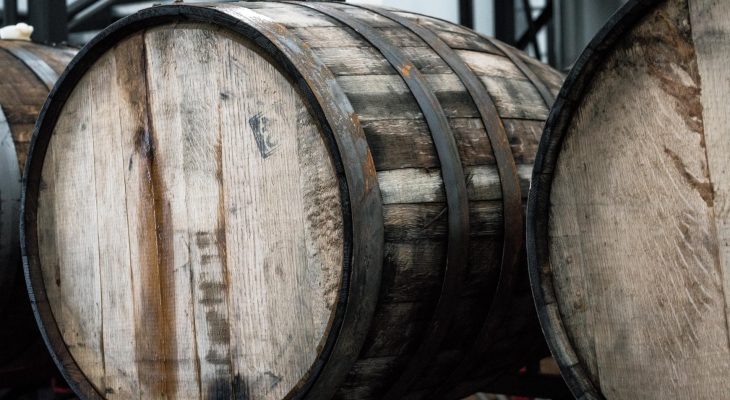
Thumper kegs are usually made from copper, stainless steel, or wood. You’d find many online home distillery or brewery kit sellers offering ones made from stainless steel.
However, many moonshiners and alcohol distillery enthusiasts, including myself, still prefer wooden thumper kegs due to wood’s great insulation capabilities. Compared to metal, wood is much better at trapping heat and maintaining the temperature inside the keg.
Remember that the higher the heat inside your barrel, the better your thumper keg works and the results you get.
A Short History of the Thumper Keg
The design of the thumper keg is an old yet classic one. Some experts say that it dates back to the time of the early European settlers in the country.
There are older European stills that use containers with a similar function to thumper kegs. Many European distillers that continue to use swan-neck pot stills use beer stripper and spirit still to turn low wine into higher-proof alcohol.
For the early settlers and illegal homebrewers of the Prohibition era, the thumper keg served the same purpose as a second spirit still.
How a Thumper Keg Works
A thumper keg receives the low wine or your alcohol’s first distillation run. This liquor is still weak, with only around 40% to 50% alcohol by volume (ABV), or sometimes around just 25% to 35% ABV. You need more distillations to get a higher alcohol potency.
So, how exactly does a thumper keg work?
Thumper kegs use the waste or extra heat that the still pot or boiler generates to double distill your moonshine or spirit.
The low wine or wash in the still pot is heated up until boiling. The heated vapors produced will be used to heat the thumper keg and refine the alcohol. Hot vapor from the still pot rises and goes through a pipe connected to the thumper keg.
It then exits and joins the liquid placed inside the container, sending heat directly into the liquid solution. This liquid solution helps condense the vapor while also allowing the heat to spread throughout the thumper.
The vapors continuously heat the condensed wash to its boiling point, basically distilling it once more. This results in a time and energy-efficient way to double distill the liquid and produce a high-proof moonshine.
Best Liquids To Use With Thumper Kegs
When using a thumper keg, you need to load it up with a suitable liquid that your low wine vapors would both condense into and heat up. The liquid you use can affect the quality of your end product.
Here are the three best liquid options to choose from:
- Spirit tails from a previous alcohol batch: This is the best option to work with. Tails from a previous run will contain alcohol that can add to your resulting moonshine. When using spirit tails for your thumper keg, make sure to only use pure tails or ones collected early on. Late spirit tails usually contain fusel oils and congeners.
- A portion of your current wash: If you don’t have any tails from your previous distillation run left or have yet to try your hand at making moonshine beforehand, then you can use some of your current wash. Although it won’t have as much alcohol present, it is still better than simply using water.
- Drinking water: Water should be your last resort when using a thumper keg. Although better than using absolutely nothing, water brings little to no benefits to enhance your moonshine’s alcohol content further.
What Thumper Keg Size to Use
There is no strict rule regarding thumper keg size. Experienced moonshine makers would typically recommend getting a thumper keg that is around 25% to 40% of your main boiler’s size.
Take note, though, that if you plan to use your thumper keg to infuse flavors into your moonshine or spirit, you’d need to get a larger one than recommended.
I usually recommend using a thumper keg that is at least 50% of your main boiler’s size. This gives you enough room to fill it with your spirit tails or current wash, plus the juices, oils, or other raw ingredients you chose to infuse flavor into your alcohol.
Infuse Moonshine With Flavors Using a Thumper Keg
A thumper keg isn’t only used for a shortcut double distillation. It can also be used to add flavor to your moonshine or spirits. You simply do so by adding your chosen flavoring ingredients to the liquid used to cool the alcohol vapors exiting from the still pot.
There are three common ways to infuse flavor into the alcohol:
Using Fruit-Infused Spirits
Choose the fruits, herbs, spices, and other flavorings you want to infuse into the alcohol. Instead of adding it to the thumper keg right away, you need to let it soak in a container filled with low wines, spirit heads, or spirit tails for at least a week.
When the flavors are infused into the low wines, use it as your primary liquid solution for the thumper keg. This method is the most time-consuming of the three options, though it produces great results.
Using Fruit Juices or Oils
For this method, you simply need to use liquid flavoring components, such as juices and oils. Fruit juices, such as apple juice, peach juice, pineapple juice, and orange juice, infuse fruity flavors into the end product. You may also use coconut oil to add flavor.
Simply add the juices or oils directly into the thumper keg, ideally together with tails from a previous run or your current wash for a bit of added alcohol content.
Using Raw Ingredients
Lastly, you can add raw ingredients directly into your thumper keg liquid solution. Aside from pieces of cut fruit, distillers also use fruit peel, herbs, spices, and mashed fruit. When using fruit, make sure to choose ones that are already very ripe for optimum flavor.
You’ll need a large number of raw ingredients to infuse flavor this way, especially when using mashed fruit. Additionally, be prepared for a messy thumper keg and a major clean-up afterward.
Best Way to Clean a Thumper Keg
If you choose to use mashed fruit and other raw ingredients, here is what you need to do to get your thumper keg sparkling clean again.
Vinegar is often used as a DIY cleaning solution in our homes, especially in the kitchen and bathroom. It’s also the simplest and best way to clean the inside of your thumper keg.
All you need to do is to mix equal parts of hot, distilled water and vinegar. Use this to fill your main boiler or still pot up to around 20% of its total volume. After that, simply run your distillation setup like you are making moonshine or any other spirit.
The temperature should reach at least 170 degrees Fahrenheit. Keep it running at that temperature for a minimum of five minutes before turning off the heat source. Let the thumper keg and entire setup cool down then empty the vinegar solution.
I recommend cleaning your thumper keg this way two to three times each year or after a particularly messy infusion.
Doing a vinegar run will ensure your container is ready for a new batch of moonshine. It helps prevent transferring of unwanted flavors to a new batch of spirits. Additionally, thorough thumper keg cleaning minimizes and cleans up the black film reaction of alcohol in copper kegs.
Conclusion
Distilling alcohol and making moonshine is a risky and complex project. All the challenges are worth it though, once you taste the fruits of your labor. To help ensure the success of your moonshine project, you need to have all the necessary information and the best tools at hand.
I hope this helps you achieve the high-proof moonshine or spirit that has eluded you so far. Happy distilling!