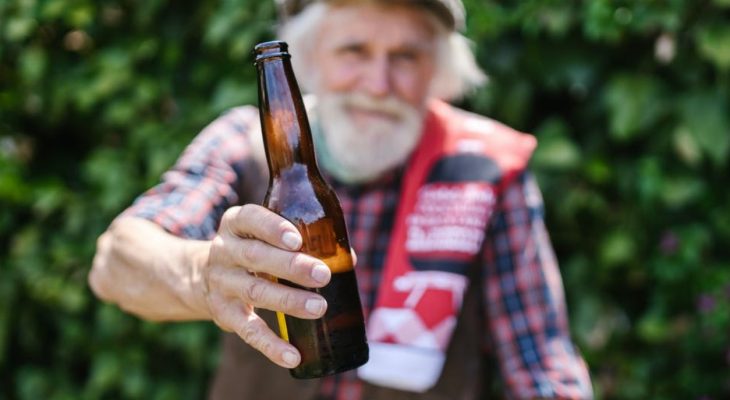
7 Ways To Increase Carbonation in Your Homebrew
Carbonation plays a vital role in every brewing process and is responsible for the final quality taste of your beer. It’s a chemical activity that enriches your beer and eliminates any potential flat taste. If your homebrew isn’t carbonating enough, it’s time to find a solution.
Here are 7 ways to increase the carbonation of your homebrew:
- Add the right amount of priming sugar.
- Ensure your bottle caps are tight.
- Fill to brim before sealing.
- Force carbonation.
- Flip your bottles.
- Increase the temperature a bit.
- Recondition the beer.
The rest of this post delves into each of these ways to increase carbonation. After reading through, you won’t have a problem with under-carbonated homebrew anymore!
1. Add the Right Amount of Priming Sugar
Priming Sugar is an essential ingredient in secondary fermentation before bottling. The sugars serve as food for the yeast, and the feeding relationship leads to carbonation (carbon dioxide production).
With the right amount of sugar, you can achieve an increase in carbonation and open your bottles to bubbles. When the yeast produces the carbon gasses, they can’t escape from the capped bottle, so they return to the beer to dissolve and enrich it with fizzy quality.
However, you need to get it right. The bottle can explode when there is excess priming sugar. When it’s less, you won’t get the perfect carbonation.
Before you determine the right amount of priming sugar to add, you must know two things first:
- The carbonation level present in your homebrew (known as residual carbonation).
- How much carbonation you want in the beer.
The fermentation temperature determines the residual carbonation at the end of fermentation. The higher the residual carbonation, the colder the beer after fermentation. So, residual carbonation is high if the beer is cold after fermentation.
To get the amount of carbonation you want, you use this formula:
Residual carbonation + Priming Sugar = Intended Carbonation
You can quickly calculate if you haven’t found the right amount of priming sugar. It’s easy with a priming sugar calculator, whether you are a newbie or seasoned homebrew.
When you get the amount of priming sugar to use with the calculator, you can apply the formula to know the exact carbonation you want.
If you can’t go through the calculating process, you can follow this rule of thumb: for every 5 gallons (19 L) of beer, add 3/4 cups if you are using corn sugar, 2/3 cups for table sugar, and 1 1/4 for malt extract.
2. Ensure Your Bottle Caps Are Tight
Let’s assume you are in the bottling stage after fermentation, and you want to know how to increase the carbonation of your beer.
Ensure the seals on your bottle caps are airtight because the gas can escape easily from older bottles. Hence, check the quality of your bottles before carbonating.
Old bottles are weak around their caps, and you can’t vouch for their ability to keep gas from escaping the beer. When the gas leaks (even in minute quantities), your homebrew will likely have low carbonation.
Try to use new commercial bottles if you want to achieve maximum carbonation, or ensure you replace the caps as often as possible.
3. Fill to Brim Before Sealing
When you prepare for bottling after fermentation, leaving more space between the top of the bottle and the beer can increase the chances of the CO2 escaping from the bottle.
When the yeast produces more carbon dioxide, the gas will try to evaporate, which is typical of a gas. However, when it tries to escape, it won’t be able to because of the bottle enclosure, so it will dissolve back into the beer.
If there’s a healthy space above the beer and the bottle cap, the gas will hang around it. If the seal in your bottle cap is not too strong, it could start escaping into the environment. To prevent this, the gap between beer and bottle caps should be as small as one centimeter.
When you are through with the bottling, take the bottles to a dark closet with no air passage and keep them for at least three days. It’s an extra measure to keep the CO2 from escaping.
4. Force Carbonation
Forced carbonation is a unique method of increasing the carbonation of homebrew. It works faster than bottle conditioning if you can’t wait for your beer to carbonate naturally.
Forced carbonation only works in a keg because the increased pressure of the CO2 can break bottles if you choose to go with bottles.
You’ll be taking the laws into your hands by adding CO2 gas yourself instead of waiting for yeast and priming sugar to produce it, and then it dissolves for your pleasure. That’s why it’s called forced carbonation.
Here are the tools you need to start:
- A homebrew keg (ensure you wash and sanitize it).
- A complete gas cylinder bearing CO2 along with a regulator.
- Gas and liquid line fittings.
Now to the step-by-step guide using the ‘set-and-wait’ method of forced carbonation
Step 1: Preparation
Once you have all the necessary tools, prepare the gas cylinder and keg. Most kegs come with gas and liquid posts. The liquid post connects to a dip tube that reaches down to the bottom of the keg.
When gas runs through the top of the keg, it enforces pressure inside it, which compels the liquid at the bottom to move up the dip tube and travel through the liquid line into your glass.
However, we will do the opposite of this process by passing CO2 through the liquid line into the dip tube. This will enable the gas build-up through the beer in the keg.
To do this, detach the gas socket from the gas line. You do not need it for this process. Then, unplug the liquid socket from its line, and fix it in the gas line to enable you direct gas through the liquid channel into the keg.
Step 2: Release Pressure Into the Keg
When your setup is complete, it’s time to release pressure from the cylinder bearing the gas into the keg using your regulator.
In this method, use a lower CO2 pressure which will help it carbonate faster. Although you still have to wait for eight to ten days, it’s shorter than natural carbonation.
Now, test if the gas is flowing properly by releasing the pressure valve of the keg for a few seconds. You’ll hear bubbling sounds: proof that gas is flowing from the cylinder through the regulator and down to the beer.
With this flow confirmed, set your regulator to release a pressure of 20 PSI and wait for at least seven days.
Precautions to take:
- Ensure the gas is not leaking in any way before the process starts.
- Release any pressure from the keg before you start by pulling up the pressure release valve.
- When you are through with the process, remember to fix things back the way they are in the keg. Transfer the gas socket to the gas line and the liquid socket to the liquid line for proper dispensing.
5. Flip Your Bottles
When your beer is not carbonating enough, the yeast is probably sluggish or cooling off at the bottom. Turn the bottles upside down: the bottom will become the top and vice versa. Keep them in that position for two days or three.
When you do this, you’ll have the yeast cake return to the suspension area and become active. Revert to the initial position of the bottle after two or three days, then allow them to continue the conditioning process.
As the yeast goes back into the suspension, it becomes reactivated and will speed up the secondary fermentation process to produce more carbon dioxide. It’s a technique that works all the time.
6. Increase the Temperature a Bit
The required temperature range for bottle conditioning is between 70°F (21°C) and 75°F (24°C). Sometimes, your environment around the beer is colder than you think, and you haven’t been keeping tabs on it. Move the beer to a warmer place, so the beer falls between 70°F (21°C) and 75°F (24°C).
A temperature change will awaken the yeast to begin fermentation.
It’s also important to note that high gravity beers will take more time to carbonate than their counterparts. They have more nutrients in the wort for the yeast to consume, and the feeding takes time.
It could be the case for your homebrew, and the general rule is to wait for more weeks. Some beers carbonate very well in eight weeks or even more. In the end, being patient often pays off.
7. Recondition the Beer
You can recondition your homebrew to increase carbonation by adding a little yeast strain and sugar to each bottle. Bottle the mix again and wait a few more weeks.
However, before you do this, ensure the beer has had enough time to carbonate fully, or this fix can result in over-carbonating, which is another problem.
Also, when you discover your beer is not carbonating enough, you are probably too early with the bottle opening. Bottle conditioning takes between two to three weeks to be complete.
The beer should carbonate well enough during this time if you did everything right before bottling. However, if your beer is still without the signature bubbles, it needs more time to carbonate further.
Don’t rush to save the situation if you’ve not given the beer enough time. While it takes two to four weeks for the bottle conditioning to be successful, types of yeast and priming sugars can also influence the timing.
I always advise that you keep a sample in a plastic bottle and use it to observe the entire batch. If the plastic is not foaming enough, it’s a sign that you need to wait further.
Give the beer one more week before checking again. If it’s still lagging in carbonation, you can recondition it.
How To Recondition Your Beer To Increase Carbonation
When you’ve done everything listed in this post, including waiting for a period, and your beer is still behind with carbonation, it’s time to fix it. To do that, you’ll have to recondition the beer using the stages below.
Sanitize Your Equipment
I can’t overstate the need to sanitize your tools. It’s as crucial as the fermentation itself. If your equipment isn’t sanitized, you will work against yourself by spoiling the beer you intend to fix.
Unclean tools harbor bacteria and wild yeast if you have used them before without proper cleaning.
After washing your tools with soap and clean water, sanitize them using a sanitizer. You should not ignore even scissors meant to open sachets of yeast.
Choose Your Dry Yeast and Rehydrate
Select two packs of dry yeast (5 grams or 0.17 oz each) that can permit high levels of alcohol. Use your scissors to cut the sachets open, and add the yeast to the warm water so it can rehydrate for about 10 minutes.
Allow it to cool a bit before proceeding. The essence of rehydrating is to awaken the yeast for the job at hand if it’s a bit dull.
Add Sugar and Stir Properly
After rehydrating, add sugar to the yeast. I recommend one tablespoon of sucrose (table sugar) or malt extract. Do this in a medical-grade sanitizer dispenser.
Stir the yeast and sugar thoroughly to obtain a foamy mixture. Then let the mixture settle for 5 minutes.
Add Sugar and Yeast Mixture to your Beer and Re-cap
Follow the steps below for the final reconditioning:
- Gather your bottles of beer and start adding the yeast and sugar mixture into them one by one.
- Use the syringe to extract 2-3 ml (0.068-0.10 oz) of your yeast and sugar combination.
- Open each bottle of beer, inject the mixture, and re-cap immediately.
- You will do this for all bottles and cap them instantly to avoid the further escape of CO2 and entry of oxygen which is not permitted.
- Leave the bottles for an additional 2 or 3 weeks.
Final Thoughts
I hope you have seen that increasing carbonation in your brew pre- and post-bottling is possible. Go over the options and choose the one most applicable to your situation–you’re sure to find one that will let you attain the perfect carbonation for your homebrew!


