The Ultimate Guide To Homebrew Beer Equipment
Brewing beer at home is richly rewarding as you retain complete control over the process. However, you need the right equipment to make things work. If you are just starting your homebrew journey, you need to know the components of complete homebrew equipment.
Some homebrew equipment you need includes essentials like the airlock and bung, fermenter, brew pot, heat source, sanitizer and cleaner, thermometer, stirring spoon, measuring cup, and nylon bags for hops. You’ll also need some bottling equipment.
In this post, you’ll discover all the tools required to make perfect homebrew and their functions.
The Essential Equipment
These are homebrew beer equipment you must have before starting the brewing process. They are basics for every homebrew enthusiast, from newbies to professionals. Take note of them and their functions as you gather them up.
Fermenter Vessel
You’ll need a vessel, bucket (plastic or stainless steel), keg, or transparent glass carboy to collect your wort after boiling for fermentation.
Your vessel choice should depend on factors like how much beer you intend to brew and your preference for the vessel material (glass or plastic).
Regardless of your choice, all vessels have their pros and cons. A glass carboy, for instance, has high thermal properties but is prone to shattering and can be expensive.
Plastic, on the other hand, is cheap and won’t break easily. However, it will degrade with time. So, you’ll need to change the bucket after a while because degradation will create room for more infusion of oxygen, which can ruin your brew.
Airlock and Bung
The airlock is an essential piece of brewing equipment that sits at the top of the fermenter and allows carbon dioxide to escape from the wort. While the gas escapes, the airlock prevents the entrance of oxygen and contaminants into the beer.
Depending on your fermenting vessel, you will need a bung or stopper to strengthen the airlock’s grip at the top of the fermenter. Without a secure airlock, pressure can build from the beer and displace the fermenter’s lid while the beer spills all over the place.
There are two types of airlocks best for homebrewing: three-piece and S-shape airlocks. Both airlocks play the same role in the fermenter but vary in price and ease of cleaning them.
Heat Source
You’ll need a heat source to effectively heat or pre-boil your batch for the best results. Your regular kitchen stove can do the job of heating for smaller batches below five gallons. For larger batches, you’ll need a bigger heat source like a turkey fryer or other options.
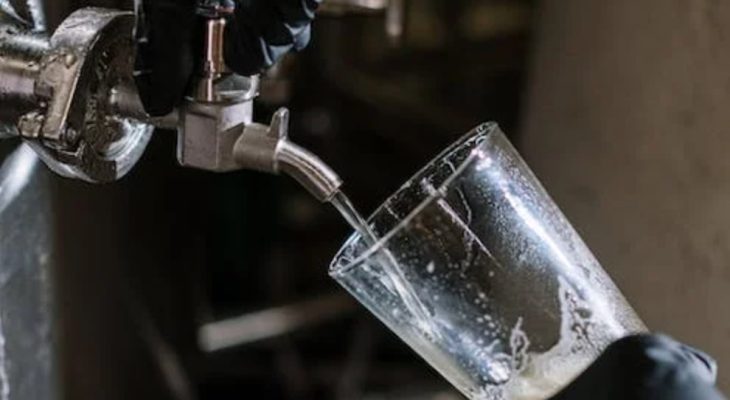
Brew Pot
All the wort-boiling happens in a boiling pot or kettle, so you can’t do without one. The boiling pot or kettle will depend on the size of your batches, and you can upgrade to a large kettle as you brew more.
I recommend you go for a larger pot or kettle so you can boil both large and small batch sizes and have ample headspace to avoid spillovers.
Sanitizer and Cleaner
You will need to clean your vessels and equipment after every successful brewing and fermentation to avoid contaminating the next batch. While there are specific homebrew cleaners, you can also make do with what you have at home.
Sanitizers are mostly the same in function as they kill microbes in your equipment, so you can use any top-quality variant you find. Some sanitizers are only for homebrews, known as no-rinse sanitizers. You can get them for more hassle-free cleaning.
Hydrometer
A hydrometer is a tool that measures the specific gravity of your wort or its sugar density. It will also help you monitor the progress of your fermentation and indicate when it’s complete or stuck through its readings.
Without a hydrometer, you can only make assumptions and conclusions about your brew’s fermentation based on visible signs which are not consistent.
Auto-Siphon and Tubing
You’ll need a siphon to transfer your final brew from the fermenter to the bottling bucket or rack off a beer stuck in fermentation to restart it. If you try to make beer transfers by hand pouring, you’ll likely end up bungling the brewing process. Also, you may have unwanted residue tagging along with beer into the bucket and heading for your bottle.
An auto-siphon does the transfer job perfectly and goes further to create a vacuum that moves the beer from vessel to vessel while avoiding contaminants and oxygen. The auto-siphon also eliminates the need to suck on the end of a tube which can be slow and exhausting.
If you can’t afford the auto-siphon, you can use any reliable and quality tubing to transfer your liquids.
Thermometer
You might think this instrument is unnecessary, and it’s true that some homebrewers don’t care about it despite its low price. However, the thermometer is a critical tool to measure the ambient temperature before pitching yeast.
Yeasts work effectively between 65°F (18°C) and 75°F (24°C) during fermentation. So, you must monitor the surrounding temperature regularly with a thermometer to ensure it’s still suitable for fermentation.
I recommend you invest in a sturdy thermometer that can withstand extreme temperatures and provide output in both Fahrenheit and Celsius.
Measuring Cup
You’ll need a measuring cup with a scale to measure the right volume of water for brewing. You’ll find measuring cups for homebrewing at laboratory equipment stores. Go for decent-sized options so you won’t need to measure water multiple times, which can slow you down.
Stirring Spoon
As the beer boils, you need to stir it to allow ingredients to circulate and avoid leaving any residue at the bottom of the pot or kettle.
You can use plastic, stainless steel, or wooden spoons for stirring. However, ensure they are strong enough to withstand heat and long enough to get to the pot’s bottom.
Nylon Bags for Hops
Nylon bags come in handy when adding hops to your boiling wort. They ensure the hops don’t break off and cling to the bottom of the pot but remain in the bag for seamless removal. You can buy the bags in bulk from your local home improvement store if you intend to brew regularly.
The Bottling Equipment
You can’t drink your homebrew from the brew pot. You will need to put the beer in bottles for easier storage and consumption. Therefore, you need to know all the important bottling equipment you need to have as a homebrew beer enthusiast.
Bottles
There’s no better glassware to contain final brews than bottles, and that’s precisely what you’ll need to package your finished brew for conditioning, storage in the fridge, and drinking.
You can get beer bottles from homebrew stores. Make sure that the bottles you buy are not twist-off bottles because these kinds are hard to seal properly.
Bottling Caps
You will need these to cap bottles, and you can get them in homebrew or liquor stores. Please ensure you go for unused caps that are still strong. You also need to ensure you get the right size for your bottles. Caps that leave spaces will ruin the brewing process.
Bottling Capper
When you’re through with the bottling, and your caps are ready, a bottling capper makes it seamless to cap your bottles for storage. It’s a unique bottle capping device in two variants – twin-lever or bench-mounted. Either option will work just as well.
Again, you can find these in local stores.
Bottle Filler
The bottle filler can be expensive to acquire, but it’s a device that helps you to fill a growler, regular bottles, and unique bottle shapes with your homebrew. More importantly, you can use it to fill up to five bottles at once, making the bottle-filling process easier and faster.
Bottle Brush
You use bottle brushes to clean and sanitize the interior parts of your beer bottles. The brushes make the cleaning thorough and easier than any other washing tool. You can use them to displace sediment clinging to the walls of bottles so they don’t deteriorate and affect your next brew.
Bottling Bucket
After fermentation, you will need to rack (transfer) your beer into a bottling bucket before they proceed to bottles. They are typically plastic buckets with valves that allow the beer to flow effortlessly into bottles.
Additionally, these bucket valves will allow beers to go into beer bottles without gathering unwanted residue.
Bottling Wand
A bottling wand is an alternative to a siphon that you can use to transfer beers into bottles. The bottling wand takes performance up a notch because you can adjust the length. It’s up to 30cm (11.8 inches) long, so it can work effectively even if you have long-neck bottles.
Bottle Dryer
Bottle dryers are quite rare to find, expensive, and may seem like going the extra mile. They dry off moisture in bottles better and faster than natural drying. The dryer also eliminates the risk of mold and other residues inhabiting glassware.
You can do without bottle dryers. However, they guarantee speedy drying, so you can use your bottles almost immediately after washing and cleaning. You can choose either a manual dryer or an electric option, but the latter is always faster.
Recommended Homebrew Equipment
These pieces of equipment are nice to haves. In many cases, you already have alternatives to them. So, you can afford to use makeshift alternatives in your early brewing days. However, as you gain more experience and move from hobbyist to more regular brewing, you will need some of them.
Strainer
You’ll find a strainer useful when racking wort from the brew kettle or pot to the fermenting vessel. The strainer will help filter hops and other solid ingredients, allowing only the liquid beer to enter the fermenter. Your standard kitchen mesh can do the job, but ensure it is clean.
Wort Chiller
As its name suggests, a wort chiller can reduce the temperature of the wort after boiling to a suitable one for yeast pitching. It’s a better alternative to ice baths and chills the wort faster.
It works by running cold water through copper pipes that absorb heat from the wort and transfer it to the cold water. The cold water then flows out using the other end of the pipe.
The wort chiller, also known as the immersion plate chiller, is reusable and durable, making it a good investment for your homebrewing needs.
Kegging System
Investing in a keg system might cost you more, but it will help you carbonate your beer faster. You can use the kegging system to force carbonate beer by pushing carbon dioxide directly into it. While it takes two to three weeks to fully carbonate a beer, the kegging system carbonates beer in two or three days.
The keg system will also be useful when your fermentation is stuck and you’ve tried every means possible to restart it but failed. Forced carbonation in a keg can get the fermentation back on track.
Refractometer
The refractometer is a substitute for a hydrometer, and they have similar roles. That said, the refractometer gives its reading faster and would require a few drops of wort to produce readings. This tool will also require the sample to cool a bit before you can take an accurate reading.
Mash Tun
The mash tun is a chamber (mini or large) with proper insulation to maintain the temperature of hot water and grain as they mix inside it to form wort. The mash tun also isolates wort from grains.
It’s more important for people brewing in large batches where it can be tougher to maintain the temperature of large volumes of water.
Wort Aerator
In homebrewing, you can’t do without oxygen. You need it to grow and energize the yeast before fermentation. Aerating your wort allows oxygen into the wort, and this device is the best for the job.
Although aerating with a tool like this can extend your brewing time up to 120 minutes, it ensures the wort is well oxidized and improves the beer’s flavor after fermentation.
Blow-Off System
A blow-off tube will create more headspace for your brew if the fermenter doesn’t have enough of it. As fermentation momentum builds, the space around the airlock accommodates bubbles and Krauss.
The blow-off tube can replace an airlock and allow thick Krauss to flow easily from the tube to another container.
Fermentation Fridge/Controller
You might not need this as a beginner, but as you grow and enhance your brewing skills, you’ll see the need for temperature control.
You can adjust your existing fridge using a temperature controller to sustain brew temperature. Alternatively, you can put together some cooling boxes and control the temperature inside them manually.
Conclusion
So, there you have it – all the equipment you need to brew at home and enjoy the rich taste of beer. You already have some of the equipment in your kitchen, and you might not need newer ones if they are in good condition.
While purchasing these tools, ensure they are of premium quality and durable, so you don’t have to change them often due to degradation.


