What Specific Gravity is in Wine Making! (Get The Research!)

If you’re an avid at-home-winemaker you must know by now that winemaking is way more than mixing grape juice, water, and some sugar, right? Right.
If you’re new to this world, expect to grab a calculator, learn a bit about chemistry and specifically called “specific gravity” respectively.
What is Specific Gravity in Winemaking? The specific gravity refers to the ratio of the density of a liquid to the density of water. It also indicates amounts of fermentable sugar or possible alcohol percentage in the must or wine. Water holds a specific gravity of 1.000. Wine, on the other hand, increases its gravity as you add sugar, for example, 1.015 in wine.
Overwhelmed? Let us break it down for you and teach you everything you need to know about Specific Gravity in winemaking.
Read Also: Is A Refractometer More Accurate Than A Hydrometer?
Why Measure Specific Gravity When Making Wine?
Winemaking is a great experience, especially if you’re just starting out. Don’t let math, chemistry and a little physics get in the way of a great winemaking process.
Because in all honesty, it might just take more than just combining a few ingredients if you want to nail your best recipe yet.
After the first fermentation in your wine has abated, which occurs at about seven days, it’s time you measure/check the specific gravity. This will help you figure out how the density of the must/wine compares to that of the water.
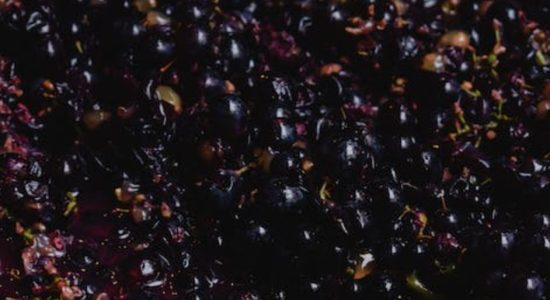
Fact: Grape juice is denser than water.
Let’s take a look at some numbers. Before the grape juice fermented, the specific gravity for it was over 1.0. Once the yeast started converting the sugar into carbon dioxide and alcohol during the fermentation process, the density of the wine starts to decrease.
For instance, a specific gravity measurement that is less than 0.990 indicates that the first fermentation has decreased enough to start racking.
The main concern? Leaving the wine in dead yeast for an excessive period of time. Then again, wine is oftentimes left sitting in decomposing yeast to convey a nutty flavor.
TIP: Unless you are an experienced winemaker and know exactly how much time is right, it’s best to play it safe and not leave the wine in dead yeast for too long.
If you leave it for a longer period of time this will result in wine tasting like rotten yeast. You don’t want that!
This is one of the main reasons why measuring specific gravity is essential throughout the winemaking process.
How to Measure the Specific Gravity in Wine
Now that you’re aware of why it’s important to measure specific gravity in wine, let’s go over the basics of how to measure it.
Remember, the entire point of measuring the specific gravity is to determine and possibly make corrections to the amount of alcohol you end up within the finished wine.
Steps you should take to measure Specific Gravity are as follows:
- Check and measure the acidity of your grape juice.
- Measure the specific gravity with a tool called a hydrometer (Amazon link). We will teach you how to use one later on during this article.
- Check out this table. Find the corresponding column according to acidity to know the amount of sugar and alcohol percentage. The middle column is for acidity.
- Want to add more alcohol? Use the same table and check the amount of sugar you need for this percentage to be fulfilled. Then, compare it to the amount of sugar already in the juice.
- Regulate the amount of sugar per liter required to increase the specific gravity to your desired value and start adding.
Hydrometer For Wine Making
No products found.
What a Hydrometer Essentially Tells You
A hydrometer is an essential tool that should be present throughout a wine or beer-making process.
This tool is used to measure the Specific Gravity of liquids prior to fermentation. The hydrometer readings will express the Alcohol by Volume you can potentially produce.
As you may have noticed, the hydrometer readings don’t just stop at the beginning of the fermentation process or are just a way to measure how much denser juice is than water. You will then need it throughout the entire fermentation process to be certain that your sugar is being converted into alcohol. This is one of the most important parts, isn’t it?
As the days go by, your hydrometer will express a daily gravity drop, as more and more sugar converts into alcohol, the gravity decreases.
Confused? Don’t be. Let’s take a look at a quick example:
– Say you’re making a typical wine. The starting gravity will be approximately from 1.075 – 1.090. Let’s take the latter as the initial reading.
– This number will change day to day by approximately 10 points and will depend on nutrition and temperature factors.
– After a few days, the gravity will have dropped to about 1.040 and will complete at 1.000 to 0.990 after approximately 7 days.
What a Hydrometer Does
Don’t forget that the essential job of a hydrometer is to help you measure the sugar in your liquids, thus, guiding you through any corrections you need to make along the way.
The higher the sugar, the higher the reading. The more alcohol, the lower the reading. A lower reading will always indicate sugar being converted into alcohol after fermentation.
Hydrometer Basics to Measure the Specific Gravity in Wine
Get your hands on a hydrometer to measure the specific gravity in your wine.
Once you have it, you will notice it has three scales:
- Specific Gravity
- Balling
- Brix/Alcohol Content
Balling & Brix: Determine the amount of sugar as a weight percent.
Alcohol: This scale will indicate the potential alcohol content you’re working with.
1: How do I determine alcohol content?
- You will need to make two readings for this, one before fermentation stars and another after fermentation is completed.
- Subtract the two numbers.
- The difference is the alcohol content in the wine.
2: How do I read a hydrometer?
- Collect a must (wine) sample.
- Pour the contents into the hydrometer tube.
- Spin it in order to remove bubbles. Take a reading of any of the scales by positioning it at eye-level.
- Record the must’s temperature as well as the reading before fermentation.
Steps on How to Use a Hydrometer for Winemaking
If you find that you prefer to use a hydrometer with a trial jar, go for it. A lot of people do. Traditionally a trial jar is about 200mm long and 35mm in diameter.
The plastic (or glass) is transparent and will allow you to fill it up before making your measurements and readings.
In order to use it, fill it up to approximately 35 mm from the top and carefully from the hydrometer in the liquid.
Once that’s done, follow these steps:
- Take a reading from the lower of the two levels.
- This expressed the SG (Specific Gravity).
- Spin the hydrometer gently so it doesn’t stick off the side of the jar.
- Place the jar on a flat surface. Some of the liquid will overflow nonetheless.
- If your wine is still bubbling, the reading will only be a guide.
Most people will use a hydrometer as a rough guide to keep going with the process. However, if you are one of those people who stands by accuracy, follow this procedure with a liquid temperature of 20°C or 68°F.
Use These Measurements to Calculate ABV
You can calculate the alcohol by volume by taking the starting gravity reading and the completed gravity reading and dividing it by 7.362.
For example, take a wine that started at 1.080 and ferments all the way down to 0.990. This means that the gravity drop was a total of 90 points. 90 divided by 7.362 is 12.23% ABV.
You Can Use Specific Gravity Calculators
Unless you really enjoy doing some math, you might want to make your life a bit simpler by using some of the available specific gravity calculators online.
Use a Brix & Specific Gravity conversion calculator which will help you convert Brix to Specific Gravity and vice versa. The Brix scale is frequently used in winemaking and Specific Gravity is measured for at-home-winemakers.
Some hydrometers will only have one or the other, this is where the handiness of a calculator like this one comes in. Unless, of course, you can get your hands on a hydrometer that allows for both these measurements – there are many available.
Use an ABV Calculator and formulas if you want an easy way to find out the alcohol by volume of your wine or want to learn more about possible formulas.
Final Thoughts
Hopefully, this article helped you clear some doubts regarding specific gravity, what it is, how to measure it and how it will guide you through the winemaking process.
It is essential that you conduct readings through every single step. This will not only help you potentially perfect your recipes but will also help you learn from your mistakes.
And hey, don’t forget to keep your readings safely noted down, you’re going to need those for tweaking and correcting.
Read Also: What Is a Manometer?