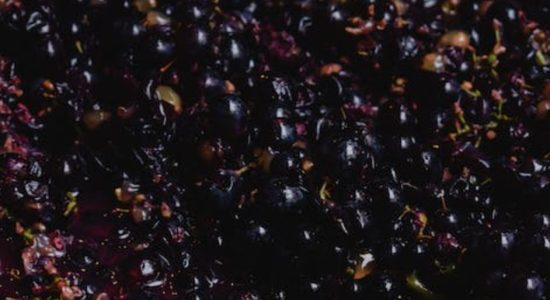
Why Did Your Wine Stop Fermenting? 8 Common Reasons
The wine fermentation process takes a lot of time and effort, and when it’s in progress, it’s disappointing to discover that it has stopped midway. Unfortunately, this is a common problem in wine preparation among homebrewers. So, why did your wine stop fermenting?
Incorrect fermenting temperature is the main reason your wine will stop fermenting. Yeast must maintain specific temperatures to maintain fermentation and straying outside of this range can cause issues. Other problems like expired yeast and distilled water can also cause incomplete fermentation.
When your wine stops fermenting, it’s called “Stuck Fermentation.” In this article, I’ll explore the main reasons why it stopped fermenting and the possible fixes.
8 Common Reasons Why Your Wine Stopped Fermenting
1. Fermenting Temperature is Too Low or High
Yeast is the central ingredient in wine fermentation and is very picky with temperature. It requires a certain temperature range (70-75F) to initiate and sustain fermentation. The yeast becomes inactive if the temperature is too low, stopping the fermentation process.
Stability within the required temperature range is vital during fermentation. If the temperature is too low, fermentation stops, and if it’s too high, it creates an enabling environment for bacteria to breed while the yeast dies off.
To ensure the temperature is stable, keep the fermenter away from areas where doors open and close, a water heater or fireplace is nearby, or anywhere the temperature is unsteady.
What To Do
When you notice that your fermentation has stopped, check for the following:
- Observe the temperature of your environment. Is it too cold? Sometimes home brewers prefer basements, kitchens, and other areas of the home that are quiet and cold for fermentation.
- Is it too hot or warm?
- Does the room have access to strong sunlight?
If you notice your environment is too cold, take your fermentation vessel off the ground because the ground will be a bit cold, especially when it’s on a tile or concrete floor.
Wrap the vessel with a thick fabric like a duvet or bed sheet, and place it on any metal table or flat surface. If the surrounding is too hot, still wrapped in thick clothing, take it to a cooler location.
Restart the fermentation with a yeast starter and observe the temperature with an adhesive crystal thermometer as often as possible.
2. Use of Distilled Water
While distilled water is the best for chemical experiments, it isn’t ideal for brewing and fermenting alcohol. It is the cleanest, but it also has no minerals that can aid the fermentation process.
The minerals contain nutrients that the yeast feeds on. When it feeds on these nutrients, it’s energized to metabolize or eat sugar.
Since distilled water has no mineral content, the fermentation process will be slow or end halfway.
Beyond minerals, the free or excess oxygen in the water dissipates during distillation. Unfortunately, oxygen and water nutrients are crucial elements in fermentation. The wine yeast needs an adequate supply of oxygen to sufficiently reproduce itself in the must.
Since oxygen is short in supply or absent, the yeast can’t reproduce freely, and the result is a fermentation that lags, often going on for weeks or stopping halfway.
If you don’t trust tap water, use bottled or spring water. You also have to be careful when buying bottled water as many of them are distilled. Check the label to know if you’re getting distilled water.
What To Do
If distilled water halted the fermentation process, there’s a possible solution:
- Open the fermenter and aerate the wine by using a sanitized spoon to stir it. The process will awaken the existing yeast and energize it.
- Include yeast nutrients or Diammonium Phosphate, which is also known as DAP.
- Adding any of these compounds will equip the yeast with the nutrients it needs to reactivate and carry on with the fermentation.
- Stir the nutrients thoroughly to ensure they saturate the solution and add another pack of yeast to ensure it’s not underpitched.
3. You Are Using Expired Yeast
Yeast is the main culprit for most fermentation troubles. If your wine has stopped fermenting, your yeast could either be too old or expired. The ambient temperatures may also be unsuitable for it.
Expired yeast will be inactive and won’t get the job done. It can start the fermentation slowly and end halfway or it might not even start at all.
Checking expiration dates is something we often overlook or forget to do. However, I’ll advise you to do it regularly since yeast has a limited lifespan post-production.
If you’re like me, you probably buy packs of yeast and store them. However, the yeast cells die gradually with each passing day, month, and year. By the time you’re ready to use them, they could be long past their due date.
What To Do
If you’re certain your fermentation stopped due to aged yeast, pitch the wine with another pack of yeast. Then add yeast nutrients to strengthen it and stir very well. Always store yeast at room temperature if you want them to remain viable for at least a year.
Storage temperatures above 80 degrees Fahrenheit (27 degrees Celsius) reduce their lifespan.
4. There Are Preservatives in Your Must
No preservatives are allowed in fermentation except alcohol which is a byproduct. If you’ve bought juice from any store, chances are that it contains preservatives like Potassium sorbates that won’t allow fermentation to continue.
Potassium sorbates kill yeast and bacteria in food which is why manufacturers use them to preserve foods. Adding these yeast inhibitors into the must will prematurely end the fermentation process.
Sulfites are pasteurizing elements added to inhibit bacteria and yeast in juices. They also kill the yeast in your wine. They dissolve and vanish with time, but it’s not a chance you should take.
What To Do
Since the preservatives have inhibited the yeast, you have to pitch the must again. You can include yeast nutrients to rev things up a bit and stir with a sanitized spoon. If you discover that sulfites were present, give the wine 24 hours.
This will give enough time for the sulfites to naturally dissipate.
5. Excessive Sugar in Your Must
Fermentation requires the presence of sugar, but you need to ensure you have the right amount. If there’s a surplus amount of sugar in your must, it will produce more alcohol. Also, keep in mind that the fruity flavors you may include could contain sugar.
Alcohol in itself is a preservative. At the initial fermentation stage, the alcohol level is enough for fermentation to continue.
However, when there is too much alcohol in the wine, you have more preservatives that inhibit the fermentation process.
Consequently, fermentation starts to slow with every rise in the percentage of alcohol in your brew until the process can no longer counter the inhibiting effects of excess alcohol.
Asides from this, you have to consider the wine yeast. It does the job of consuming sugar to produce alcohol but it can only consume so much before it exhausts itself.
When the yeast can no longer convert sugar to alcohol, you’ll have too much of both in your must.
What To Do
When adding sugar to a must, use a hydrometer to measure the right amount according to a wine recipe. It will ensure that the alcohol level is moderate for the wine since sugar is a precursor to it.
If you’ve already added too much sugar and the yeast is overwhelmed with the consumption, you can add yeast nutrients to the must. In most cases, adding a yeast energizer will strengthen the yeast and continue the fermentation process.
6. Using an Airlock in Primary Fermentation
When fermentation begins, the yeast takes the first few days to multiply. The wine yeast can reproduce up to 200 times in the first week of fermentation. It’ll dedicate a substantial amount of its energy to reproduce and multiply, so it needs oxygen for this activity.
After the yeast is through with the reproduction of more cells, it goes into secondary fermentation. In this stage, it devotes time to consuming all sugars present in the wine to produce alcohol.
Since the wine yeast needs more air to reproduce, a wine airlock will prevent air from coming in.
Hence, the yeast won’t produce more of its cells and will stay passive.
Few yeast cells can’t do the job of producing alcohol, so the process runs slowly until the available yeast cells wear themselves out.
What To Do
If you’ve made this mistake, remove the airlock and restart the fermentation with a yeast starter and nutrients. This time don’t use an airlock to cover the fermenter. Use a string instead, and tie a breathable clothing material over the fermenter.
It will allow air to gain access to the wine yeast for it to reproduce successfully without giving access to dust particles.
After the first week, the primary fermentation is complete, and you can use an airlock for the cover. The secondary fermentation process won’t need air.
7. Your Yeast Starter Is Too Warm
Most yeast packets come with instructions to rehydrate the yeast to ensure the fermentation starts within a short time. The wine yeast should be rehydrated in warm water for 11 to 15 minutes before using it.
Yet, it’s easy to go above the temperature if you aren’t careful when warming. If the yeast stays in the water for more than 15 minutes, its temperature could rise outside of recommended ranges.
When the water for the yeast rehydration is too warm, or the yeast stays in the water for too long, it becomes weaker for the job of fermentation. Weakened yeast that goes into a must won’t last. It will become inactive quickly, and the fermentation will follow suit.
The recommended temperature range for warming the yeast is between 95 and 105 degrees Fahrenheit (35 to 41 degrees Celsius). From 105 degrees Fahrenheit (41 degrees Celsius), the yeast cells will start dying if you don’t rescue them from the water.
What To Do
First, ensure you check the temperature of the warm water before adding wine yeast to it. Use a wine-making thermometer to check this and be sure it’s within 95 and 105 degrees Fahrenheit (35 to 41 degrees Celsius).
To be safe, don’t exceed 95 degrees Fahrenheit (35 degrees Celsius).
Remember to track the time the minute you add yeast to the warm water. Ten minutes is enough time to get it warmed up for action.
Most yeast cells are already gone after you’ve done the damage. If this happens, restart with a fresh batch and ensure you maintain the proper temperature.
8. Your Fermentation Is Complete
When your fermentation stops, two things are possible; your fermentation is either stuck or complete. So, the only way to find out what is responsible for the stoppage is to check with a hydrometer: a handy tool I recommend for every winemaker.
When checking with your hydrometer, any specific gravity reading below 998 means the fermentation is complete. If the reading is above this figure, it’s incomplete and you can follow other reasons for stuck fermentation mentioned in this article.
Fermentation typically takes a week or two to complete. However, it can happen overnight or in three days depending on the process conditions.
What To Do
When it’s complete, but you are not satisfied with the fermentation result, or you want more alcohol by volume (ABV), you can do this:
- Ensure the seal in your fermentation bucket is tight.
- Check your fermentation reading from the hydrometer to be sure of your initial result.
- Add more sugar and another strain of yeast that will work well with a high ABV, and the fermentation will continue.
Conclusion
When your wine stops fermenting, it’s called “Stuck Fermentation.” This is a tricky problem as there are many possible causes. However, you can create a checklist of possible causes to determine what you’ve done wrong.
If you can’t go through the trouble of doing that, restart the fermentation using a yeast starter, and ensure the temperature is neither too low nor too high. In most cases, fermentation stops because the yeast is inactive, and the temperature is unfavorable for fermentation.