How To Easily Clean Beer Bottles for Homebrewing

If you’re a homebrewing fan, you may have encountered difficulty finding a container to store your beer in. The good news is that regular beer bottles will do fine after a thorough cleaning.
You can clean beer bottles through a thorough process of first soaking them, then cleaning with a wire bottle brush, and later sanitizing them with or without heat.
Most homebrewers already know that beer just tastes better in a bottle, and when that bottle is properly cleaned and sanitized, it can take your experience to a whole new level. In this article, I’ll discuss how you can turn even the nastiest beer bottles into the perfect homebrew bottles. Let’s get started!
1. Choose the Right Type of Beer Bottle
The first step is, of course, to start with the right type of beer bottle (after making sure that the brew is ready to be bottled). While dozens of different types exist, not all of them are suitable to be reused. Even if they are, not all of them are suitable for homebrewing. So let’s talk about what you should look for when choosing a bottle.
The first thing I want to make mention of is where you get your bottles matter. You can usually find many beer bottles in recycling bins, but remember that these may not be ideal for homebrewing.
For several years, most major beer companies have put their beer in lightweight single-use bottles. Similar to disposable water bottles, these aren’t designed to be used more than once. While you can clean them and attempt to reuse them, you’ll likely be dealing with more breaking than you want to.
Types of Reusable Bottles
There are many options to choose from regarding reusable beer bottles. Many homebrewers purchase their bottles, but in today’s article, we’re talking about bottles that have already been used.
You’ll want to look for bottles that are meant to be reused. There are a few different types of these, and it seems like they’re becoming more common as people transition into homebrewing. Let’s look at a few of the options you have available to choose from.
- Glass Long-Necked Bottles: These are the most common type of beer bottle and the most likely one that you’ll find while searching for recycled bottles. Typically, these bottles are transparent, which can present problems when homebrewing. However, it doesn’t mean that they can’t be used.
- PET Bottles: These bottles are very durable. While they aren’t made of glass, they are an excellent option for homebrewing. PET bottles are made from polyethylene terephthalate, a type of heavy-duty plastic. These bottles also come with a bottle lid, which makes it easier to bottle your homebrew.
- Glass Swing-Top Bottles: These bottles have a lot of usefulness in that they don’t require any machinery to place the bottle cap on. Instead, you just need to place the cap on the bottle mouth and flip the clip around the neck of the bottle. The downside to these bottles is that they aren’t quite as durable as some of the others.
- Oxygen Barrier PET Bottles: These bottles are almost exactly like PET bottles, except they prevent oxidation. This is due to their thicker body design. Oxidation happens when oxygen interacts with the beer, and it often ruins the beer’s flavor.
For more information on some of the best bottles to use for homebrewing check out this video:
Color Matters
The last thing I want to talk about concerning choosing the right bottle is paying attention to the coloration of the bottle. Normally beer bottles come in clear, green, or various shades of brown.
When it comes to homebrew, darker is better. While you can use transparent bottles, especially if you’re looking for a cheaper option, they must be hidden away from the sunlight.
For example, if you’re storing your homebrew in an underground shed or something similar, transparent bottles are fine to use.
However, if the beer isn’t well protected from the light, it’s best to look for brown bottles since they block UV rays from entering the beer and ruining it. Most glass swing top bottles have this coloration, and some PET bottles.
2. Soak the Beer Bottles
Now that you’ve found your bottles, it’s time to start cleaning. This step is fairly simple, and honestly, it’s the easiest part of the entire process.
You’ll first want to find a large pot or even utilize your bathtub if you have too many to fit inside the pot. Fill up the container with very hot and soapy water.
If you can use boiling water, this is best because it will help to soften the labels for easy removal. It will also remove a lot of the gunk that’s built up on the inside.
Trust me; you’ll want this to come off easily because if there’s even a hint of anything remaining in the bottle, it can ruin your homebrew.
Bear in mind that bottles, especially the long-necked glass ones, will not invite water in. The best thing to do is dunk them up and down in the water to ensure the bubbles and hot water soak into the glass.
Other Products You Can Use for Soaking
If you want the bottles to come out as clean as possible even before using the brush on them, you may want to consider using other cleaning products besides just soap and hot water.
One of the best options is adding bleach to your soaking water. If you choose to do this, rinse the bottles thoroughly afterward. The good news is that bleach evaporates fairly quickly. However, you’ll still want to remove any leftover residue.
Another thing that you can do is spray them with alcohol ahead of time. This will also help the labels to come off easier once you get to that point. You’ll want to place the alcohol inside and outside the bottle.
A final option to look at is adding baking soda and vinegar to the bottles ahead of time. Baking soda does wonders for removing odors and loosening some of the gunk built up around the walls of the bottles. Vinegar reacts with the baking soda and amplifies its cleaning power.
How Long To Soak the Bottles For
You’ll want to ensure that you soak the bottles for at least an hour, but longer is better. Ideally, you would want to soak them for between two and three hours for maximum cleaning effectiveness.
The plus side for you is that soaking the bottles is the easiest part of this process. Consequently, the longer you can soak them, the easier the rest of the cleaning will be.
It’s important to remember, however, that soaking won’t remove everything. That’s why we’ll clean with a wire bottle brush afterward, but we’ll talk about that in a few more minutes.
3. Remove the Labels
The next thing you’ll want to do is remove all the labels from the bottles. If you’ve gathered the bottles from recycling bins or found them along the side of the road, the labels are likely already partially peeled off.
However, you can expect to find the annoying white parts of the label still stubbornly remaining on the bottle.
The soaking process should have loosened the labels almost completely, but you may find that some require repeated soaking sessions.
There are a few different ways you can remove the labels. The first thing I would suggest is simply peeling it away. However, remember that this will only work for whole labels. If you choose to peel the label, peel it slowly away from you. It may help to grip it with a paper towel.
Another method is to run the bottle under the warmest water your hands can stand and scrub the label off. You can use steel wool or something similar, but remember that this will also scratch the bottle. If you want your bottles in mint condition, try using something softer, like a microfiber cloth.
Another thing to consider is using a razor blade to remove the labels. This method can be a little more time-consuming, but razor blades work wonders at getting underneath sticky labels.
4. Clean the Bottles Thoroughly With a Wire Brush
There are lots of various bottle brushes you can use, but I would recommend something like this LabRat Supplies Pipe Cleaning Brush Set from Amazon. While these specific cleaners are recommended for auto mechanics, the stainless steel bristles do an excellent job removing any crud left over after the soaking process.
So, let’s talk about how to clean the bottles properly. You might be tempted to just quickly scrub the inside, especially if you have an entire batch of bottles to do. However, remember that a thorough cleaning takes time, and you’ll want the bottles to be as clean as possible in preparation for adding the homebrew.
The first thing you’ll want to do is rinse the bottles after soaking them. If you have leftover soap bubbles, you may find it difficult to see if there’s any remaining debris inside the bottle. Once the bottles have been rinsed, it’s best to hold them up to a light source and look inside the bottle.
At this point, you’ll likely notice small specks along the edges of the wall. Unless a beer bottle was rinsed ahead of being disposed of, the yeast would probably have solidified on the walls. Yeast is one of the unavoidable parts of making beer, but it practically turns to concrete once it’s dried.
While the soaking process should have removed a good bit of it, you can expect that there will likely still be some remaining.
How To Remove Leftover Yeast From the Bottles
This is where the wire brushes come in handy. Simply insert the brush into the bottle and move it up and down wherever you see debris. You’ll want to make sure that the brush can reach all the way to the bottom of the bottle. Otherwise, it may not get completely clean.
If you’re having trouble getting the dirt and yeast to loosen with the brush alone, there are a few products that you can use. One is, of course, baking soda. Placing a bit of baking soda on the end of the brush will provide a more abrasive surface against the bottle.
Another thing you can add is Powdered Brewery Wash (PBW), which can be used with either hot or cold water. The PBW will help tremendously to loosen any stuck yeast or dirt. If you don’t want to use this specifically, you can also look into any other alkaline-based cleaner of your choice.
5. Rinse and Sanitize the Bottles
The final step in this process is to rinse and sanitize all your bottles. Once you’ve cleaned all the bottles, be sure to run water throughout them. Ensure that they are thoroughly rinsed, especially if you use bleach or other chemicals during the soaking process. You don’t want any residue remaining.
You might find that it’s a bit troublesome to get out any bubbles in the bottles. If this is the case, the best thing to do is just allow water to run through it until it runs clear.
To sanitize and sterilize your beer bottles, the typical option is to boil them. Boiling water kills any bacteria and will also kill any bacteria on your bottles. You’ll want to leave them in boiling water for eight to ten minutes. This will ensure that anything harmful is entirely destroyed.
Keep in mind that your bottles will be more prone to breaking during this time since they’ll be heated to high temperatures. It’s best to let the water cool to a safe temperature before attempting to remove them.
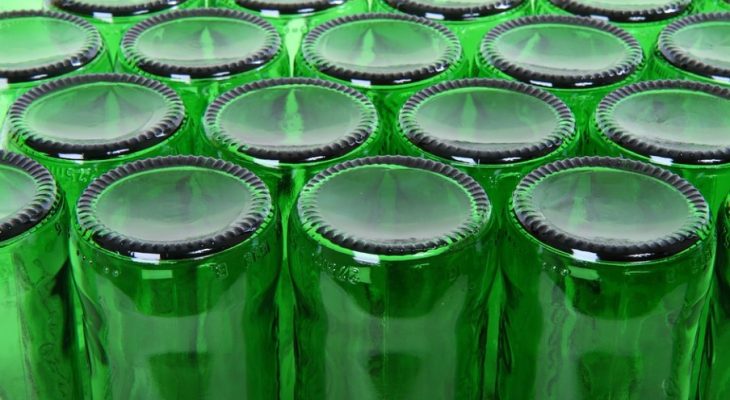
Once the bottles are clean and sanitized, it’s time to dry them. Make sure that you place your bottles in an aerated area upside down. If you leave the bottles right side up, they won’t dry properly. They also won’t dry well if no air flows through the bottle.
You can do this by either placing them in a drying rack or by putting them in your dishwasher and sending them through a heat dry.
Conclusion
As a review, here are the steps covered today.
- Select the correct bottles. Look for reusable glass bottles or PET bottles. Pay attention to the color. Darker is better.
- Soak the bottles. Soak in hot soapy water for at least one hour and up to three or four hours.
- Remove the labels from the bottles. You can do this by scrubbing with steel wool or with a razor blade.
- Clean the bottles thoroughly. Use a wire brush.
Rinse and sanitize your bottles in boiling water. Dry in an aerated environment.


