How To Make Beer With Dry Malt Extract (Tips and Tricks)
Malt extract brewing is the most common entry point to homebrew beer. Extract shortens and simplifies the process, making it much easier for a beginner to get the hang of it. Despite the simplicity, there are some important things to pay attention to when brewing with extract, which will allow your beer to go toe-to-toe with all-grain beer.
Your brewing equipment must be properly cleaned and sanitized before you start brewing. Use fresh ingredients for the best results. You can steep some grains into your wort to get more body and flavor, and you should limit the sugar content. Using high-attenuation yeast is also advisable.
If you want to dabble in dry extract brewing, you’ve come to the right place. I’ll go over the equipment you need and the steps you need to make, so you’ll be able to produce high-quality beer in no time.
1. Prepare and Sanitize Your Equipment
You can’t start the brewing process without the right equipment. The easiest way to get the right gear is to buy a brewing kit. Brewing kits are inexpensive and contain almost everything you need for brewing beer.
You’ll probably have to get the boil kettle and bottle caps separately, but that shouldn’t be a big issue. Any kettle that’s big enough will do, and bottle caps are widely available.
Here’s a list of all the equipment you’ll need for dry extract brewing.
- A boil kettle
- A fermenter
- A bottling bucket
- A bottling wand
- An auto-siphon
- Transfer tubing
- A hydrometer
- An airlock
- A bottle capping machine
- Sanitizer
If you’re brewing a small batch of beer, I suppose you could pour it into the bottles with a simple plastic siphon straight from the fermenter. This might be difficult if you’re making a big batch, and it might be messy, so it’s easier if you use the proper equipment.
You must also get some beer bottles. You should get 50 12 oz bottles for a standard batch. You can buy new bottles, or you can recycle old ones. The second option is cheaper and more eco-friendly. If you don’t break them, you can practically reuse them forever.
It’s important to pick thick glass bottles. You should avoid bottles that aren’t made specifically for beer. Those bottles let too much light in, which affects the flavor and might even ruin it.
Unlike bottles, you can’t reuse bottle caps. You should always have some fresh caps for each batch of beer you brew.
Alternatively, you can keg your beer. It might be more expensive initially, but a keg is almost indestructible, so you’ll have it (or them, if you make big batches) for a long time.
Your brew kettle should be large enough to hold your wort without boiling over. You can boil on your stovetop if it’s big enough, or you can use a propane burner.
Clean and Sanitize Your Equipment
Hygiene should be one of the primary concerns when preparing to brew your beer. Thoroughly cleaning and sanitizing everything will prevent the growth of wild yeast and bacteria.
Wild yeast can over-ferment your beer and ruin its flavor. It can even lead to your bottles exploding, and wasting your beer, so taking time to sanitize everything will save the future you from a headache.
You can use a sanitizer such as Star San. Thoroughly wash and sanitize everything that comes into contact with the wort, especially the fermenter, boil kettle, and bottles.
2. Prepare the Ingredients
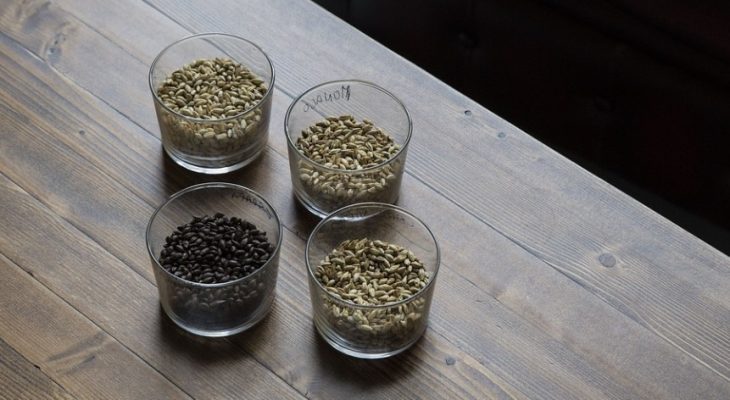
Preparing the ingredients for extract brewing is a piece of cake. What you need are the following ingredients.
- Dry extract. Dry extract is much easier to use than liquid extract, so it’s much more convenient. It’s a fine powder that keeps well, so you can stock up on it.
- Water. You can use your tap water if it’s drinkable. You can use any good-tasting water for brewing. Alternatively, you can buy gallons of spring water and store them if you have the space.
- Hops. You can get pellets, plugs, or leaves. Those options are fine and work much better than oils and various bittering agents.
- Yeast. You should try to get the freshest yeast you can find. Yeast with higher attenuation is preferable when using dry malt extract. You can choose between dry and liquid yeast. It’s easier to work with dry yeast, so you should go for this kind if you don’t have much experience brewing with dry malt extract.
- Priming sugar. This refers to the sugar added to the bottles before bottling. This starts the re-fermentation process and results in carbonation. It’s usually corn sugar or dark brown sugar. You can even use honey.
- Grains (optional). Grains are unnecessary when brewing with extract because the sugars have already been extracted. However, you can steep a small quantity in your wort for twenty minutes before it boils. It adds a nice touch to the beer.
When buying ingredients, make sure they’re fresh. Fresh ingredients will allow your beer to ferment much better and help you avoid problems in the process.
You can sometimes find pre-hopped malt extracts. Avoid them because hops will lose bitterness and other flavors during storage. Plus, this won’t significantly shorten your brew day, so there’s no point in going down that route.
While dry malt extract keeps well, you can’t just leave it out in the open. It can oxidize, so you must store it in a tightly sealed container.
3. Boil the Water and Add Your Dry Extract
The process of extract brewing starts with boiling water. No mashing is necessary because the sugars have already been extracted and sold to you as a neat powder in a bag.
If you want to use some grains to enhance the flavor, start by heating your water to 160°F (71.1°C). Put your grains in a mesh bag, steep them for about twenty minutes, then remove and discard them.
Many brewing kits come with specialty grains you can steep, but you can also buy your own. It’s easier to buy crushed grains because then you don’t have to do it alone, and you don’t have to invest in a grinder.
Once you’re done with the grains, remove the boil kettle from the heat. Stir in your extract and return to the heat. The boil should last for around 60 minutes.
A 60-minute boil has become the accepted standard in brewing. You could theoretically get away with boiling for a shorter time, but 60 minutes is enough to get all the bitterness out of your hops and thoroughly sterilize your wort.
It’s important to boil the wort without a lid on. Malts contain sulfur compounds that convert to DMS, which stands for dimethyl sulfide. The compound ruins the taste of your beer and can be volatile.
If you uncover the wort while boiling, DMS will evaporate. If your beer is covered, DMS will simply return to the wort, and you won’t be able to get rid of it.
During the boil, you should wait for the hot break. A hot break is when the proteins and polyphenols coagulate and fall to the bottom of the kettle in chunks. It happens between five and 30 minutes after a nice boil starts.
Add your hops after the hot break starts. This is optimal for getting the most out of your hops.
After 60 minutes of boiling, you can kill the heat and remove your kettle from your stovetop or propane burner. It’s time to proceed with the process.
4. Chill the Wort
Chilling the wort is important because you can’t add your yeast to it while it’s hot. It has to cool down so the yeast can do its magic and ferment your beer.
You should always cool your wort to 68°F (20°C). This is the best temperature for pitching the yeast and letting it work its magic.
Getting an immersion chiller is an easy way to chill the wort. However, you can use a simple ice bath to help it cool faster. Place your kettle in a tub with cold water and 10-15 pounds (4.5–6.8 kg) of ice.
You can speed up the process by adding cold water to the wort. Some recommend adding two gallons (7.5 liters), but it might be too much. You should be careful not to dilute the wort, so add little by little and rely on the ice bath.
Chilling the beer as fast as possible is important to prevent the growth of bacteria and wild yeast. That’s why you can’t let it chill on its own. This would likely lead to an infected beer.
5. Add the Yeast and Let the Beer Ferment
Once the beer is cold enough, you can transfer it to the fermenter. This can be a simple sterile plastic container or a glass carboy.
Before you pitch your yeast, you should aerate the beer. This allows more oxygen into the beer so your east can reproduce better, leading to better fermentation. The simplest way to aerate the beer is by shaking it for 120 seconds.
If you have a bigger batch of beer, it might be difficult to shake it. There are some other tricks you can try.
You can use a wine degasser. Attach it to a drill and stir your wort with it for around 40 seconds. This gets a lot of oxygen into it and creates a nice thick foam. You can also get an aeration system, but this tends to be expensive, and you probably don’t need it as a home brewer.
Once the beer is aerated, check its gravity with a hydrometer. Gravity here refers to the beer’s density. Most beers have an original gravity of around 1.050, but it will depend on the recipe you’re following.
The gravity you measure at this point is called original gravity. Knowing the gravity of the beer will allow you to calculate the ABV later on.
Add the yeast after aerating your beer and checking its gravity. Seal the lid and add the airlock to it. Let the beer ferment for two weeks in a dark and cool place.
You should carefully control the temperature during the fermentation. Different types of beer will require different temperatures, so you should follow your recipe for the best results.
Carefully controlling the temperature will turn a good beer into a great beer. This step can’t be skipped if you want to up your brewing game.
6. Bottle Your Beer
Before you start bottling, you must take a reading of the beer’s final gravity to calculate its ABV. Original gravity shows how much sugar there is on your beer before the fermentation process, and final gravity shows how much sugar has disappeared and turned into alcohol.
You’ll need a bottling bucket and wand for the easiest bottling. You should add your priming sugar to the bottling bucket at this point.
If you’re not using a bottling bucket, add priming sugar to the bottles. You can do this if your beer batch is small, but you’ll easily make a mess, so it’s best to avoid this.
After bottling, seal the bottles tightly and put them in a dark and cool space. The ideal temperature is between 70°F and 75°F (21.1°C and 23.8°C).
Instead of bottling your beer, you can store it in a keg or multiple kegs if it’s a big batch. This is a less popular method, but it has its place, so you can also look into it.
Your beer will need between one and two weeks to finish the carbonation process. You taste a bottle after a week to see if the process has finished. If it hasn’t, let your beer rest for another week.
Final Thoughts
Brewing with extract is an excellent way to get started. Despite it being a method often associated with beginner brewers, it can give you excellent results and a beer that’s up to par with all-grain beer.
Always source fresh ingredients and make sure your equipment is sanitized. Make sure not to boil the wort for too long and always tightly control the fermentation temperature. These steps will give you a great batch of beer every time.


