How To Make Hard Cider (Step-by-Step Guide)
Hard cider is distinct from beer in taste but similar in how it’s crafted. To make a hard cider, you can use all your homebrew tools and even a few ingredients you likely already have.
To make hard cider, you’ll need apple juice, a few add-ins, and yeast. You’ll heat up half of your apple juice to create the cider, add sugar and seasonings, and then add the remainder. Lastly, you’ll put some yeast in the jar and allow it to ferment for anywhere from one to two weeks.
The hard cider process is pretty similar to the beer-making process. Still, there are a few important differences I’ll go over below. Additionally, I’ll finish this article with some info on other flavors and seasonings you can add to your cider to give it a unique taste.
1. Get All of Your Equipment in Order & Sanitize
The first thing you will need for home brewing is the equipment.
You can buy everything you need from a homebrew supply store or online. If you’ve already been homebrewing with us at Home Brew Advice, you probably have most of this stuff in your kitchen.
There are a lot of kits on the market, but here’s what you need to get started:
- 5-gallon (19 L) glass carboy.
- Airlock for fermenter.
- Fermentation airlock stopper or jar (gallon works best).
- Plastic spoons.
- Thermometer.
- Ladle.
- Hydrometer, which is used to measure alcohol content and monitor the progress of your brew as it ferments.
Cider is a great place to start if you aren’t familiar with home brewing because you don’t need much.
As an advanced maker, you’ll also want basic equipment, such as:
- A large pot with a lid.
- Measuring cups and spoons.
- A cheesecloth or strainer bag for straining solids from your cider after fermentation (or just use a funnel).
- Airlock beer bottles or flip-top bottles with airlocks attached. These are excellent if you don’t want sediment in your final product.
You could even use glass jars capped off with screw top lids if that’s all you have at home—just make sure they’re sterilized before using them!
Once you have all your tools, you’ll need to sanitize! Anything growing on your equipment will destroy your cider’s survival chances, so don’t skip this step.
2. Go Shopping for Your Ingredients
Most people like making their hard cider apple-flavored, but I’ve also seen some funky flavors over the years. For this article, I’ll give you a list of apple ingredients, but down below, I’ll talk about some more about other flavors you can use.
Your grocery list should contain the following:
- A gallon of apple juice without preservatives (or, if you want to make your own apple juice, you’ll need about 20 pounds (9.07 kg) of apples).
- Sugar. White or brown works for this recipe, but brown seems to add more depth.
- Add in flavorings, such as cinnamon, clove, raisins, etc.
- Champagne or cultured yeast.
The yeast you use is pretty important, and I like to use champagne yeast when making hard cider. However, any brewing yeast will work, so don’t let this deter you from getting creative!
If you do want to add some preservatives to your juice so it’ll last longer, you should complete this step now and take a pause for at least twenty-four hours.
Most people swear by Campden Tablets (available from Amazon.com), which are used to preserve alcoholic drinks. They’ll make your cider taste better for longer, but this step is optional.
You could also add a pectic enzyme to help with the cloudiness, but this is also an optional and mostly an aesthetic and texture-conscious step.
3. Add Sugar, Flavors, and Infuse Your Juice
Apple juice usually already has a good amount of sugar in it, but we’re going to add more anyway. Here are the steps for infusing your brew:
- In your large pot, add only half of your apple juice. Don’t bring this to a boil; just warming it will do. It should be simmering for the next step.
- Add about half a cup of brown sugar to your juice. If you prefer to use a sugar replacement such as xylitol, that’s okay! No changes would be needed measurement-wise.
- Stir to let this sugar dissolve. It won’t be completely gone (and you don’t want it to be).
- I also like to let my seasonings begin to infuse during this step. Add a stick of cinnamon, a handful of cloves (no more than ten cloves), and whatever flavorings you want to try in your homebrew cider.
If you’re using a slow cooker, pour apple juice and equal water parts into it and set it to “high” for an hour or two. That’ll make your house smell great and infuse your juice with the flavors you’re adding.
Let this cool down before transferring it.
4. Transfer Cider, Add Yeast and Give It a Shake
Once your cider concoction has cooled down, you’ll transfer it into a large jar and strain out your larger ingredients (cinnamon and cloves, in our case!).
If you lost some sugar in the transfer, make a note. You’ll want to re-add this to the mixture.
Whatever jar you’re pouring into will be your fermentation jar, so ensure it has an airlock and your fermenting equipment can connect to it.
At this point, it’s time to combine your yeast with your apple juice.
- Add the rest of the apple juice on top of the new juice in the jar.
- Add the yeast.
- Throw in another pinch or so of sugar for good measure.
And if you’re feeling funky, there’s nothing wrong with adding a cinnamon stick or a clove or two–this just makes the flavor stronger. Just make sure to add a lid to your jar and give it a good shake before proceeding to ensure everything is all mixed together.
5. Attach Airlocks To Your Fermenter
Now, I’ve gone on record saying that adding an airlock to your fermenter isn’t necessary. If you need to skip it because your airlock is broken suddenly, and you’ve got six gallons of cider waiting to brew, that’s okay.
So do you need it or not? I explain a little more in this YouTube video:
In general, this is the park where the airlock comes in. Your ingredients are in the jar, your yeast is active, and it’s time to lock it in.
Airlocks allow gasses inside your container to escape without letting outside air (and bacteria) in. They create an airtight seal between your fermenting vessel and its lid, so nothing gets in or out.
All you need to do for most airlocks is screw it on or press it into the opening of your container, depending on which type you use! This allows the process of fermentation to begin.
Now, store your jar in a cool dark place out of the way!
6. Ferment Cider
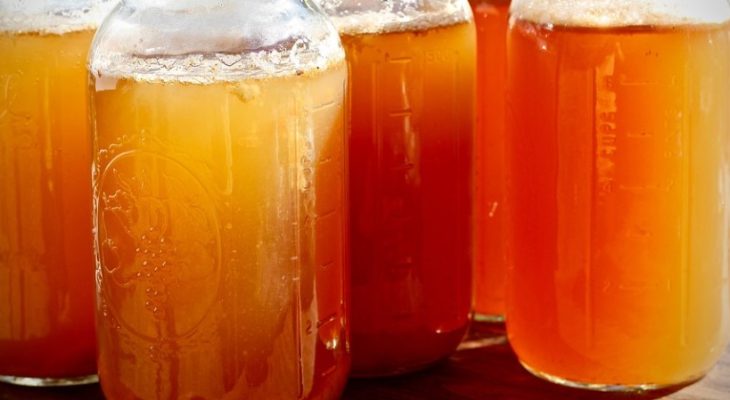
Cider is best when you let it sit for a few weeks in a jar. The longer you let it ferment, the more alcohol and sweetness you’ll get.
When it’s done, you’ll see that the cider has become bubbly, and some sediment may be at the bottom of your jar.
You can strain out this sediment if you want to, but it’s not really necessary—it just means that there are still some active yeast cells in your cider, which is fine.
You can also use a hydrometer if you’re worried about not being able to tell by sight alone.
The hydrometer will tell you what percentage of alcohol is present in your brew, which will tell you how much more sugar is needed before it’s ready to be bottled and enjoyed.
7. Bottle Your Cider and Enjoy!
First, you’ll need some bottles. You can use any kind of glass bottle—just ensure it’s clean and has a sealable cap. If you want to be extra fancy (and have the money), you can buy special bottles for homebrewing cider.
Next, get yourself some caps for those bottles. You’ll want to get either crown caps or swing tops—either one is fine. Crown caps are common on most commercial ciders, while swing tops are more common on craft brews.
Whatever you choose, just make sure they match up with whatever kind of bottle you’ve chosen.
Finally, you’ll need some kind of wax or plastic sealer that goes around the neck of your bottle—this helps keep air out and preserves your cider over time.
You don’t have to buy anything fancy here. I’ve seen some even bottle their cider in old spaghetti sauce jars. Depending on your vibe, this might be right on brand for you, so go with what you have.
Just make sure it’s been sanitized!
Now, you can kick back and enjoy your cider. Keep in mind the hydrometer process above, and make sure to warn your friends if your cider has a higher ABV than usual.
What Ingredients Do I Need To Make Hard Cider?
Typically, you’ll find recipes for apple juice turned into hard apple cider. But if you’re an avid cider drinker, you know this isn’t the only way to do it!
While it’s the most common, you can switch up your ingredients to try and get some other flavors in there.
Any combination of the following should be perfect for your homebrewed cider:
| Juice | Seasonings |
| Apple | Cinnamon |
| Cranberry (combine 1:4 with apple) | Orange zest |
| Pomegranate (combine 1:4 with apple) | Lemon zest |
| Berry (combine 1:4 with apple) | Lime zest |
| Grapefruit (combine 1:4 with apple) | Clove |
| Grape (combine 1:4 with apple) | Raisins |
| Pineapple (combine 1:4 with apple) | Cranberries |
| Cherry (combine 1:4 with apple) | Nutmeg |
| Pumpkin cider (combine 1:4 with apple) | All spice |
| Pear juice | Ginger |
| Anise | |
| Cayenne Pepper | |
| Chile |
As you may have noticed, none of the above juices work without a little apple. That’s because the technical classification of cider requires it to come from “crushing fruit, typically apples.”
For that reason, I like to keep the majority of my mixture of apple juice no matter what I’m adding. However, if you’ve got the time and heart for it, go ahead and change up those ratios.
As for the other add-ins, you’ll add them as usual during the step where you infuse your juice. You’ll have to venture out on your own for measurements, but I’d say take a spoonful before you begin fermenting or anything just to taste.
If it doesn’t taste good beforehand, or the flavor isn’t there, it won’t taste good after the fermentation process.
Why Yeast Matters
Above, I mentioned that I tend to use champagne yeast for cider. This isn’t the only way to do it, though. If you aren’t familiar with the process, yeast is a living organism that helps to turn sugar into alcohol.
The most common type of yeast used in the kitchen is the bakers’ or bread yeast, which is sold in packets at grocery stores, which can be used to make different types of alcohol.
For all-grain ciders, brewers use a different type of yeast called ale yeast. This type of yeast is easier to work with than bakers’ yeast because it doesn’t require special treatment before adding it to your cider mixture.
In addition, ale yeast produces carbon dioxide gas during fermentation. It gives apple cider a slight fizziness when you open it for drinking.
Some people like to add champagne vinegar or Champagne yeast to their homemade ciders because both products will give them some fizziness. Additionally, some brewers use wild yeast to make their brews!
This isn’t to say you can’t use baker’s yeast to make your homebrew. Just know you may have to do a little to activate it, such as combining it with water and a little sugar until foamy or whatever the package tells you to do.
Final Thoughts
Homebrew cider is a great way to get your hands dirty and make something delicious with friends. You can make it as strong or weak as you like and experiment with different flavors to find what suits you best.
Whether you’re looking for something sweet or spicy, there are many ways to make your own cider at home.