How To Make Sake at Home (Step-by-Step)
Sake is an alcoholic beverage from Japan. But there’s no need to book a ticket to the Orient because you can make one for yourself.
You can make sake at home using a unique method called sandan shikomi. This technique involves three phases to simultaneously allow the starch to turn into sugar and then alcohol. You’ll need pots, a fermentation bucket, strainers, sake yeast, rice, and koji rice.
Although making sake-making does not require much fancy equipment, it can be tedious and time-consuming, as you’ll discover in this article. But the wonderful flavor and kick you get are worth the process.
1. Gather Ingredients and Materials
Sake in Japanese refers to any alcoholic drink, while nihonshu refers to a beverage made from fermented rice. Although many people refer to it as a rice wine, making sake is more like beer brewing. Because, like beer, sake is made from starch turned into alcohol.
If you’re interested in beer brewing, you can start with this article: How To Make Beer at Home (Easy and Basic Step-by-Step).
Let’s look at some of the ingredients you’ll need to make sake.
Ingredients
Gather the following ingredients to make sake at home.
Sake Yeast (Smack Pack)
The yeast is responsible for fermentation, which turns sugar into alcohol. However, this yeast is unique, unlike the traditional ones used for beer or wine.
It’s packaged so that you have to smack the pack to release the yeast into a revitalizing slurry. The slurry’s nutrients and sugars activate the yeast to metabolize and produce CO2, which inflates the bag.
Polished Sake Rice
You can use short-grain table rice if you don’t have sake rice. But what’s the difference between the two?
Sake rice is polished, so there’s less protein, and the starch is easier to access inside the grain. Sake made from this type is often more flavorful and delicate, but not all polished sake rice is the same, as some contain more protein than others.
This led to the development of different sake types:
- Ginjo: Around 40% of the rice grain is polished away to make this sake.
- Daiginjo: At least 50% of the rice grain or husk must be polished away to make daiginjo. Distilled alcohol is also added in small amounts for flavor.
- Junmai: This sake type requires at least 60% of the grain to be polished away. However, unlike daiginjo, there’s no added alcohol for junmai.
- Honjozo: The polishing ratio for honjozo is at least 70%. Like daiginjo, there is added alcohol, specifically brewer’s alcohol.
If you’re curious about measurements, 1 kilogram (2.2 pounds) of polished sake rice usually makes 2.38 L (80 fl oz) of sake with an alcohol content of 15%.
Koji Rice
Koji rice is treated with a fungus mold scientifically known as Aspergillus oryzae. But don’t worry, as this mold is food-safe. The mold breaks down the starch in rice into sugars, which is critical because yeast cannot turn starch into alcohol, only sugars.
Thus, koji rice helps address that gap, making it possible for the conversion process of rice starch into sugar and sugar into alcohol to happen in one vessel.
Other Ingredients
Besides those unique ingredients, you’ll also need the following:
- Lactic acid to prevent contamination of the seed mash
- Wine yeast nutrient
- Epsom salt
- Morton salt substitute
- Reverse osmosis or distilled water
- Ice
If you’re curious about the use of reverse osmosis water for brewing, you can read about it here: Can You Use RO Water To Brew Beer? It’s a good substitute for distilled water, and you can make up for the lack of minerals using ingredients like Epsom salt.
Materials
Besides the ingredients, you’ll also need other materials or equipment, such as:
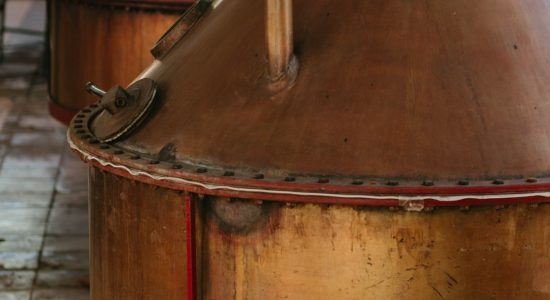
- Pots
- Metal strainer
- Cheesecloth
- Jars/Bowls/Water containers
- Refrigerator
- Colander
- Steamer
- Thermometer
- Spoons
- Carboy
- Airlock
- Funnel
- Bottles
You probably have most of the materials and equipment needed for making sake at home. For instance, you’re likely to have a lot of pots already, but if you still need to get pots for brewing, I’d recommend using aluminum ones, and if you want to know why read my piece here.
Meanwhile, some materials may be new to you, like the airlock, especially if you have yet to try brewing. If you need recommendations, check out my article: The Best Airlocks For Homebrewing » (Guided Airlocks Tour).
Ensure all the materials and ingredients you’ll use are clean or sterile. It would be a shame to put in so much effort and be wasted because of contamination.
2. Make and Ferment the Yeast Starter
After preparation, you’ll start by making the yeast starter or shobu. This process can take a few days:
- Day 1: Loosen the Wyeast 4134 yeast pack by shaking the packet and let sit for 24 hours. Over time, the bag will inflate from the CO2 produced by the yeast.
- Day 2: When the yeast pack is nearly fully inflated, mix water with acid, yeast, Epsom salt, and Morton Salt. Set aside some of this mixture in a new container and leave the rest until the next day. Cover both containers.
- Day 3: Open the inflated yeast pack and stir its contents into the room-temperature water mixture. Add koji, stir, and let stand.
This is yet to be the shobu, as you still need to combine it with steamed rice.
3. Soak and Steam Rice
Work on your rice prep while letting the yeast starter rest. The rice involved here is the sake or polished one.
These are the steps:
- Rinse the sake rice 2-4 times to ensure it is clean and that most of the starch is removed.
- Pour water over the rice and put it in the fridge for 1-2 hours.
- Pour the rice over a sieve and allow the mixture to drain fully.
- Using a steamer, cook the rice until soft.
4. Prepare the Seed Mash
To complete the shobu preparation, here are the steps:
- Mix up the steamed rice with ice cubes. Give it an hour to allow it to come down to just above room temperature, which is around 69℉ (21℃).
- Mix your yeast starter with the rice in a large bowl and place a lid over the top. Let it sit for 12 hours. After this, use a sanitized spoon to stir the mixture for 5 minutes.
- Leave this mixture to soak for three days, making sure it’s set just above room temperature at all times. Keep it covered and open only to stir twice a day.
- Keep the mixture covered and untouched for at least a week, ensuring it stays at room temperature at all times.
The mixture left to stand is your shobu or seed mash.
5. Add the First Batch of Fresh Rice
After nearly a week, you’ll need to add new rice to your mixture. Here’s how to do that:
- Add koji to your seed mash, then water. Make sure it’s fully incorporated.
- Put the seed mash in a covered container in the fridge for a few hours.
- Measure some polished or sake rice and wash it until all the starch has been removed. Leave this mixture for an hour or two.
- At this point, you’ll need to set your fridge thermostat to 13°C (55°F).
- After the rice has soaked, steam it.
- Once steamed, mix the rice with ice cubes until it reaches room temperature.
- Retrieve your pot with the shobu and add the cool steamed rice. Stir, then cover.
- After 12 hours, give the rice a good whisk.
- Cover the rice and put it back in the fridge at a lowered temperature.
- Keep the covered pot at room temperature for a couple of days. Give the mixture a gentle stir about twice a day.
At this point, the mixture is called a moromi or the main mash.
6. Add the Second Batch of Fresh Rice
The steps here are similar to the addition of the first batch of rice and can be done after a couple of days have passed.
- Add soaked koji to your seed mash. Ensure everything is incorporated and covered.
- Wash, soak, drain, and steam sake rice again. While the rice soaks and drains, lower the original mixture’s temperature from 55°F (13°C) to 48°F (9°C).
- Allow the mixture to reach room temperature.
- Once it’s reached room temperature, you can mix the koji and rice mixture into the seed mash. Incorporate the mixture and cover it up for about half a day, at which point you can stir it one more time.
7. Add the Third/Last Batch of Fresh Rice
The steps for this entry are similar to the previous one. A primary difference is maintaining the temperature of the fermenting mixture. The mixture should be at 45°F (7°C) already, but you’ll need to cool the steamed rice until it is at 55°F (13°C).
- After adding the final batch of rice, you will keep the pot closed for 2 days except when you’re stirring it. Stirring should be done every 12 hours.
- After those two days of stirring, keep the pot covered for 12 days. You just have to wait. Don’t stir or do anything else during this time.
This addition of rice in three batches is called sandan shikomi or a multi-parallel fermentation process. In between sets, the yeast does its magic of fermenting the sugars made by the mold from the rice starch.
This process is what sets sake apart from beer. With beer, the conversion of starch to sugar and then sugar to alcohol occurs separately, but with sake, it happens simultaneously.
8. Bottle the Sake
When the 12 days are done, you can transfer your sake to a carboy or fermentation bucket, then let it ferment a bit before bottling.
Follow these steps to bottle your sake:
- Strain the mixture into a large container. At this point, you can throw away the seed mash mixture.
- Pour this liquid directly into a fermentation bucket. Make sure it’s fixed and impenetrable. You can use an airlock for this.
- Put the fermentation bucket into the fridge. Let it stay there for 1 week or 7 days.
- Carefully pour the sake into individual, sterilized bottles using a funnel. You can also use a siphon, but don’t disturb the sediments while doing this.
- Cap each bottle. Store the bottled sake in the fridge for 1 month at 33°F to 40°F (1°C to 4°C).
If you’ve never used an airlock before, check out this YouTube video on whether you need an airlock for fermenting:
If you’re at a loss as to what bottle type you should use, I also talk about them in this post: The Best Bottles For Homebrewing » (Complete Buying Guide).
I also have bottling tips here in this article: 10 Essential Tips for Bottling Homebrew. It’s mainly applicable to beer, but some notes are helpful for bottling sake too. For instance, I included some recommendations for a bottle filler or siphon, which makes the process easier, and there’s less risk of spills and waste.
9. Serve the Sake
After a month in the fridge, you can enjoy your homemade sake. It sounds like a long time was spent making sake, but specific variants take longer to be ready because they have to be aged for years, like koshu sake.
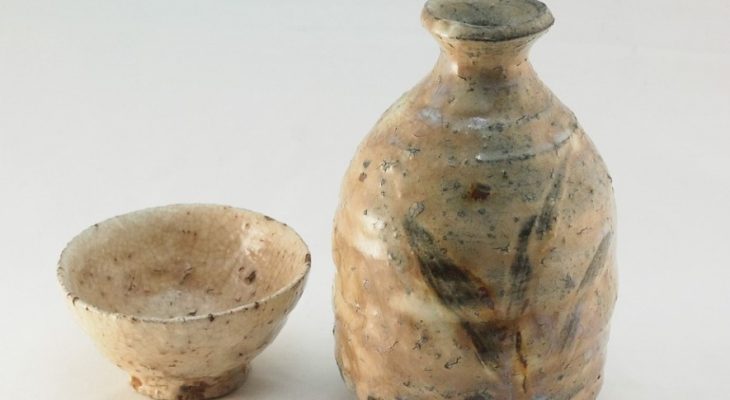
Although you can drink sake as it is, there are nuances to how it is consumed. Certain types of sake may be best chilled, room temp, or even hot.
It also isn’t drunk straight from the bottle, like beer. Instead, it is poured into a ceramic or glass cup, but if you want to be ceremonious or there’s a special occasion, you can use the masu, a wooden box made especially for sake.
The Japanese also have a specific etiquette for serving sake. If you’re the host, you can’t allow your guests to pour the drink themselves, so you must watch if someone’s cup is running low and refill it for them.
Final Thoughts
Making sake is tedious and time-consuming. However, the procedures are relatively straightforward, so once you get the hang of it, it becomes simpler and faster than it seems.
However, if you want to try making another simple alcoholic beverage, you can go for mead. For a comprehensive guide, check out this article: How To Make Mead at Home – (Easy Step-by-Step).